The skateboard deck is more than just a piece of wood; it’s a canvas for self-expression, a tool for creativity, and a platform for pushing boundaries. For many skaters, the deck’s surface is the perfect place to showcase their personality, interests, and affiliations.
From iconic logos and artistic designs to personal mementos, stickers transform a standard skateboard into a unique statement. But where exactly should you place these decals to maximize their visual impact, durability, and overall aesthetic?
The art of sticker placement is a subtle yet significant aspect of skateboard culture. It’s about balancing personal style with practical considerations like grip tape functionality and board wear. Whether you’re a seasoned pro or just starting out, understanding the best spots and techniques can elevate your board’s look and your skating experience.
This guide will explore the most popular and effective places to put stickers on your skateboard, offering insights into why certain locations work best and how to achieve a professional-looking finish that lasts.
Key Takeaways
- Deck Top (Grip Tape Area): Ideal for smaller stickers, logos, and personal graphics that you want to see while riding, but can affect grip.
- Deck Bottom (Graphic Side): The primary real estate for large, impactful designs, brand logos, and artistic statements, offering the most visibility.
- Trucks and Hardware: Small stickers can personalize these functional components, adding subtle details.
- Wheels and Bearings: Less common but can offer unique, rotating visual effects; durability is a major concern.
- Consider Grip Tape Interaction: Stickers on the top can wear down quickly and interfere with grip.
- Durability Matters: Choose high-quality, weather-resistant stickers for longevity.
- Placement Strategy: Think about visibility, balance, and how the stickers will interact with the board’s natural wear patterns.
- Layering and Composition: Combine different sticker sizes and shapes for a dynamic look.

Credit: www.youtube.com
The Underside Canvas: Deck Bottom Sticker Placement
The bottom of your skateboard deck is arguably the most sought-after real estate for stickers. This is where your board makes its grandest statements, displaying artwork, logos, and messages to the world as you cruise, grind, and flip. Unlike the top, the bottom surface is less prone to immediate wear from your feet and grip tape, allowing your stickers to remain vibrant for longer.
This makes it the perfect spot for your most prized or visually striking decals.
Maximizing Visibility And Impact
When placing stickers on the bottom, consider the overall composition. Skateboard graphics themselves are often elaborate designs, so your stickers should complement, not clash with, the existing artwork. Many skaters opt to cover a significant portion of the bottom with a collage of their favorite brands, art pieces, or even personal photos. This creates a unique, layered aesthetic that tells a story about the rider.
-
- Central Focus: Placing a single, large, or particularly meaningful sticker in the center of the bottom can create a powerful focal point. This is often done with a favorite brand logo or a striking piece of art.
-
- Collage Style: A popular approach involves arranging multiple stickers of varying sizes and shapes across the entire bottom surface. This requires careful planning to ensure a balanced and visually appealing arrangement. Think about overlapping stickers strategically to create depth and avoid large gaps.
-
- Edge Placement: Some skaters prefer to line the edges of the deck with smaller stickers, framing the central graphic or creating a border effect. This can add a subtle touch of personality without overwhelming the main design.
Durability And Protection
While the bottom is more protected than the top, it still encounters scrapes and impacts from curbs, ramps, and rough surfaces. To ensure your stickers last, consider these points:
-
- Quality of Stickers: Invest in high-quality, vinyl stickers designed for outdoor use. These are typically waterproof, UV-resistant, and more durable than standard paper stickers.
-
- Application Technique: Ensure the surface is clean and dry before applying. Press firmly from the center outwards to eliminate air bubbles. For larger stickers, using a credit card or squeegee can help achieve a smooth, wrinkle-free finish.
-
- Protective Clear Coat (Optional): For maximum longevity, some skaters apply a clear coat spray over their stickers and the entire bottom graphic. This adds an extra layer of protection against scratches and fading. Ensure you use a spray compatible with vinyl and skateboard materials.
Example: Many professional skateboarders have iconic bottom deck graphics that are instantly recognizable. Think of the classic designs from brands like Santa Cruz or Powell-Peralta. Skaters often replicate this by meticulously curating their own sticker collections to create a similar level of visual identity on their own boards. This dedication to the bottom graphic transforms the skateboard into a mobile art piece.

Credit: www.decals.com
The Functional Frontier: Deck Top Sticker Placement
The top of your skateboard deck, covered in grip tape, presents a unique challenge and opportunity for sticker placement. While it’s where you stand, and thus where stickers are most likely to wear down quickly and interfere with grip, it’s also a prime spot for personalizing your ride in a way that’s visible while you’re skating. Strategic placement here can add a personal touch without compromising performance.
Balancing Aesthetics And Grip
The primary concern when placing stickers on the top is maintaining adequate traction. Stickers, especially thicker vinyl ones, can create smooth patches on the grip tape, potentially causing your feet to slip. Therefore, the type and placement of stickers on the top are crucial.
-
- Small Logos and Symbols: Smaller stickers, like brand logos, symbols, or minimalist designs, are often placed in areas of the grip tape that are less critical for foot placement, such as near the edges or around the bolts.
-
- “Ghosting” Technique: Some skaters use a technique called “ghosting,” where they apply stickers and then lightly sand over them with a piece of grip tape. This allows the sticker’s design to subtly show through the grip tape without significantly altering the texture. This is best for very thin, durable stickers.
-
- Around Bolt Holes: The area around the truck mounting bolts is often a good place for small stickers. These spots are less critical for foot grip and can add a subtle detail.
-
- Strategic Placement for Tricks: For certain tricks, skaters might place stickers in specific spots to help them visualize board rotation or to mark a preferred foot position.
Sticker Types And Application
Not all stickers are suited for the top of a skateboard. The demands of foot friction and potential moisture require specific choices.
-
- Thin, Durable Vinyl: Opt for thin, high-quality vinyl stickers. They are less likely to create a significant bump and are more resistant to abrasion.
-
- Avoid Overlapping Grip Tape: Never place stickers directly over large areas of grip tape where your feet will be planted. This will inevitably lead to peeling and loss of grip.
-
- Consider Wear and Tear: Be prepared for stickers on the top to wear out much faster than those on the bottom. This can be part of the aesthetic for some, showing the history of your skating.
Pro Tip: If you’re really set on having a larger graphic on the top, consider using a sticker that’s precisely cut to the shape of your foot’s contact area and then carefully applying grip tape over it. This is an advanced technique that requires precision but can yield a unique, integrated look.
Personalizing The Peripherals: Trucks, Wheels, And Hardware
Beyond the deck itself, other components of your skateboard offer smaller, yet distinctive, opportunities for sticker customization. While these areas are less common for large-scale decoration, they allow for unique, subtle touches that can make your board truly one-of-a-kind.
Truck Stickers
The trucks are the metal T-shaped axles that attach your wheels to the deck. Their relatively flat surfaces, particularly the kingpin nut and the hanger, can accommodate small stickers.
-
- Kingpin Nut: A tiny sticker placed on the kingpin nut can add a small pop of color or a recognizable symbol. This is easily visible when you look down at your board.
-
- Hanger Surface: Some skaters place small, durable stickers on the sides of the truck hangers. These are subtle but can be seen when the board is at certain angles.
-
- Durability Concerns: Trucks are exposed to a lot of grime, moisture, and direct contact with ledges and rails during grinds. Stickers here will likely wear quickly, so choose small, robust decals and expect them to be temporary.
Wheel And Bearing Customization
Customizing wheels and bearings with stickers is less common due to their constant motion and the nature of their wear. However, it’s not unheard of.
-
- Wheel Sidewalls: Small stickers can be applied to the sidewalls of skateboard wheels. As the wheels spin, these stickers can create interesting visual effects, especially when the board is in motion. However, the constant friction and potential for abrasion mean these stickers will likely peel or wear off very quickly.
-
- Bearing Covers: Some skateboard bearings have plastic covers that can be removed and potentially adorned with tiny stickers. This is a very niche customization, as the covers are small and not always easily accessible.
-
- Practicality vs. Aesthetics: The primary drawback here is the extreme wear and tear. Unless you are using specialized, adhesive-backed wheel graphics (which are rare), standard stickers are unlikely to last more than a few sessions on the wheels.
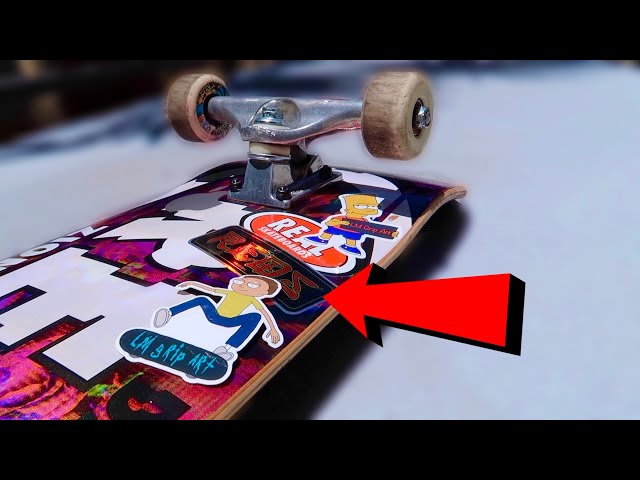
Example: You might see skaters with a small, iconic band logo sticker on their kingpin nut or a tiny, weathered sticker on the side of their truck hanger. These aren’t meant to be permanent statements but rather small, personal touches that add character.
Credit: www.youtube.com
Strategic Placement: Thinking Like An Artist And A Skater
Applying stickers to your skateboard is an art form that blends personal expression with an understanding of how the board functions and wears. The best sticker placement considers both visual appeal and practical limitations. It’s about making deliberate choices that enhance your board’s aesthetic without hindering your skating.
Composition And Balance
Just as an artist considers the composition of a painting, a skater should think about the overall balance and flow of their stickers.
-
- Symmetry vs. Asymmetry: Do you prefer a perfectly symmetrical arrangement, or a more dynamic, asymmetrical look? Both can be effective depending on your style.
-
- Color Theory: Consider how the colors of your stickers interact with each other and with the underlying deck graphic. Using a limited color palette can create a cohesive look, while a riot of colors can convey energy.
-
- Scale and Proportion: Varying sticker sizes can add visual interest. A large central sticker balanced by smaller ones around it can create a pleasing composition. Avoid overcrowding, which can make the board look messy.
Considering Board Wear
Skateboards are subjected to significant wear and tear. Understanding where this wear typically occurs can inform your sticker placement strategy.
-
- Tail and Nose: The tail and nose of the board are often the first parts to show significant damage from ollies and other tricks. Placing stickers here means they will likely get scraped and torn quickly. This can be embraced as part of the board’s “battle scars.”
-
- Edges: The edges of the deck can get chipped and worn from grinds and slides.
-
- Center: The middle of the deck, especially the top surface, experiences friction from your feet.
Example: A skater might place their most important or visually appealing stickers on the bottom of the deck, knowing they will be relatively protected. On the top, they might opt for very small, durable stickers in less critical grip areas or accept that stickers placed there will be temporary and tell a story of their skating sessions.
Sticker Types And Application Best Practices
The longevity and appearance of your skateboard stickers largely depend on the type of stickers you choose and how you apply them. Not all stickers are created equal, and a little care during application can make a big difference.
Choosing The Right Stickers
-
- Vinyl Stickers: These are generally the best choice for skateboards. They are durable, waterproof, and often UV-resistant, making them ideal for both the top and bottom of the deck. Look for outdoor-grade vinyl.
-
- Holographic/Glitter Stickers: These can add a unique visual flair but may be less durable than standard vinyl. Their textured surfaces can also sometimes affect grip if placed on top.
-
- Paper Stickers: While cheap and easy to find, paper stickers are not recommended for skateboards. They tear easily, are not waterproof, and will degrade quickly from foot friction and the elements.
-
- Die-Cut vs. Kiss-Cut: Die-cut stickers are cut to the exact shape of the design, while kiss-cut stickers have a backing sheet with multiple stickers. Both work, but die-cut stickers often offer cleaner edges for placement.
Application Techniques For Longevity
Proper application is key to ensuring your stickers stick well and last as long as possible.
-
- Clean the Surface: Before applying any sticker, thoroughly clean the area of the skateboard deck. Use a degreaser or rubbing alcohol to remove dirt, grime, and any old adhesive residue. Ensure the surface is completely dry.
-
- Position Carefully: Plan your placement before peeling off the backing. Measure or eyeball the position to ensure it’s exactly where you want it.
-
- Peel and Apply Slowly: For larger stickers, peel only a small portion of the backing paper at a time. Start applying from the center and work your way outwards, smoothing the sticker down as you go. This helps prevent air bubbles.
-
- Use a Squeegee or Credit Card: For larger stickers, use a firm edge, like a credit card or a specialized squeegee, to press the sticker onto the surface. This ensures maximum adhesion and helps push out any trapped air.
-
- Apply Pressure: Once the sticker is in place, apply firm pressure all over its surface, especially around the edges, to ensure it’s fully adhered.
-
- Avoid Bubbles: If you notice small air bubbles, you can sometimes prick them with a fine needle and then press the air out. For larger bubbles, it might be best to peel the sticker back carefully and reapply.
-
- Allow Curing Time: For maximum adhesion, allow the stickers to cure for at least 24-48 hours in a dry environment before exposing the board to heavy use or moisture.
Example: When applying a large graphic to the bottom of a board, I always start by cleaning the surface with isopropyl alcohol. Then, I peel back about an inch of the backing from the center, align the sticker, and press down. I then slowly peel the rest of the backing while simultaneously using a credit card to smooth the sticker down from the center towards the edges. This method has always prevented bubbles and ensured a strong bond for me.
Creative Sticker Placement Ideas
Beyond the standard spots, there are always ways to get creative with your skateboard stickers. Thinking outside the box can lead to unique customizations that set your board apart.
Layering And Overlapping
Don’t be afraid to layer stickers on top of each other, especially on the bottom of the deck. This can create a dynamic, textured look.
-
- Base Layer: Start with larger, more foundational stickers.
-
- Mid-Layer: Add medium-sized stickers, potentially overlapping the edges of the base layer.
-
- Accent Layer: Finish with small, eye-catching stickers placed strategically on top of others or in unique spots.
Incorporating Board Features
Look at the natural contours and features of your skateboard deck and consider how stickers can interact with them.
-
- Around the Concave: Stickers placed along the edges of the deck’s concave can emphasize its shape.
-
- Edge Graphics: Using thin stickers to create patterns or designs along the very edge of the deck can be a subtle but effective detail.
Thematic Sticker Collections
Instead of random placements, curate a collection of stickers around a specific theme. This could be:
-
- Favorite Bands or Artists: A tribute to your musical inspirations.
-
- Travel Destinations: Mementos from places you’ve visited or dream of going.
-
- Skate Brands: A showcase of the brands that have influenced your skating journey.
-
- Personal Art: Your own drawings or designs.
Example: One creative approach is to use stickers to create a narrative or a visual story on the bottom of the deck. For instance, a series of space-themed stickers could be arranged to depict a journey through the galaxy, with planets, stars, and a rocket ship. This requires thoughtful planning but results in a highly personalized and engaging design.
Frequently Asked Questions
Where Is The Best Place To Put Stickers On A Skateboard?
The bottom of the deck is generally considered the best place for significant sticker placement. It offers the most visible canvas, is less prone to immediate wear from foot friction, and allows for larger, more impactful designs. The top of the deck can also be used, but requires careful consideration of grip tape functionality and sticker durability, favoring smaller, thin stickers in less critical foot placement areas.
Will Stickers Affect My Skateboard’s Grip?
Yes, stickers placed on the top of the deck can affect grip, especially if they are thick, textured, or cover large areas where your feet make contact. They can create smooth patches, reducing traction. To minimize this, use thin, durable vinyl stickers and place them strategically in areas less critical for foot placement, or consider techniques like “ghosting” where the sticker is subtly integrated into the grip tape. Stickers on the bottom of the deck do not affect grip.
How Do I Make Skateboard Stickers Last Longer?
To make your stickers last longer, choose high-quality, outdoor-grade vinyl stickers. Ensure the skateboard surface is clean and dry before application. Apply them carefully, smoothing out any air bubbles and pressing firmly, especially around the edges. For the bottom of the deck, you can optionally apply a clear coat spray over the stickers and graphic for added protection against scratches and UV fading. Be aware that stickers on the top of the deck will naturally wear out much faster due to foot friction.
Can I Put Stickers On My Skateboard Trucks Or Wheels?
Yes, you can put stickers on your trucks (kingpin nut, hanger sides) and wheel sidewalls. However, these locations are subject to significant wear, grime, and moisture. Stickers on trucks will likely wear down quickly. Stickers on wheels can create interesting visual effects when spinning but are highly prone to peeling and abrasion. For these areas, small, durable stickers are recommended, and you should expect limited longevity.
Is It Okay To Cover The Entire Bottom Of My Skateboard With Stickers?
Absolutely! Covering the entire bottom of your skateboard with stickers is a very popular and effective way to personalize your board and express your style. It creates a unique, layered aesthetic. The key is to plan your composition, choose durable stickers, and apply them carefully to ensure they adhere well and look cohesive. This approach transforms your deck into a dynamic piece of art.
The skateboard is a deeply personal item, and how you adorn it with stickers is a significant part of its identity. Whether you choose to cover the entire underside with a vibrant collage, place a single, meaningful decal on the top, or add subtle touches to your trucks, the process is about making the board your own.
By understanding the best placement areas, considering the type of stickers, and employing careful application techniques, you can create a skateboard that not only looks great but also stands up to the rigors of skating. Let your creativity flow and turn your deck into a true reflection of your personality and passion for skateboarding.