How to Make a Kicker Ramp: Step-by-Step DIY Guide
Building your own kicker ramp can transform your driveway or backyard into a place for skateboarding, BMX, or scooter tricks. Many people think ramps are expensive or complicated, but making one yourself is possible with basic tools, clear instructions, and smart planning. Whether you’re a beginner or have some experience, learning how to make a kicker ramp helps you understand the structure, materials, and safety required. This guide walks you through every step, shares practical tips, and answers common questions, so you can create a reliable ramp that suits your needs.
Understanding The Kicker Ramp
A kicker ramp is a small, angled ramp that gives riders a boost into the air. Unlike large quarter pipes or launch ramps, kicker ramps are portable and simple. They’re popular for practicing jumps and tricks because they’re easy to move and store.
Most kicker ramps are about 12–24 inches high, 3–4 feet wide, and 4–6 feet long. This size works well for beginners and intermediate riders. The angle is usually between 20–30 degrees, which offers a gentle lift without being too steep.
Why Make A Kicker Ramp Yourself?
Buying a ready-made kicker ramp can cost $200–$500. Making one yourself is often much cheaper—usually $70–$150—plus you can customize the size and shape. You also learn about construction, which makes it easier to repair or improve your ramp later.
Many beginners miss the importance of ramp stability and surface smoothness. These two factors affect safety and performance. Building it yourself allows you to focus on these details.
Planning Your Ramp: Size, Shape, And Location
Before you start, decide where you’ll use the ramp and who will ride it. Think about:
- Rider skill level: Beginners need a lower, less steep ramp.
- Available space: Measure the area where you’ll place the ramp.
- Portability: If you want to move the ramp, keep it light and small.
Choosing Dimensions
Most standard kicker ramps use these measurements:
- Height: 16–24 inches
- Width: 3–4 feet
- Length: 4–6 feet
If you’re building for kids or new riders, start with a height of 16 inches and a length of 4 feet. Advanced riders may prefer a taller ramp for bigger jumps.
Deciding The Angle
The angle affects how high and far you launch. Too steep makes landing difficult; too shallow reduces lift. A 25-degree angle is a good middle ground.
| Height (inches) | Length (feet) | Ramp Angle (degrees) | Skill Level |
|---|---|---|---|
| 16 | 4 | 20 | Beginner |
| 20 | 5 | 25 | Intermediate |
| 24 | 6 | 30 | Advanced |
Gathering Materials And Tools
The right materials mean your ramp will last longer and feel safer. You’ll need:
- Plywood (3/8″ or 1/2″ thick): For the surface, use exterior-grade plywood.
- 2×4 lumber: For the frame. Get 8–10 pieces, 8 feet long.
- Screws (2–3″ wood screws): For joining wood.
- Galvanized nails: Optional, for extra strength.
- Metal coping (optional): For the edge, helps tricks slide smoothly.
- Sandpaper: To smooth surfaces.
- Paint or sealant: Protects wood from moisture.
- Rubber feet or mats: Keeps ramp from sliding.
- Tools: Saw, drill, measuring tape, pencil, square, screwdriver, safety glasses.
Material Comparison
Choosing between different wood types and thicknesses is important. Here’s a quick comparison:
| Material | Cost (USD) | Durability | Recommended Use |
|---|---|---|---|
| Exterior Plywood (1/2″) | ~$35/sheet | High | Main surface |
| OSB Board | ~$25/sheet | Medium | Frame sides |
| Pressure Treated 2×4 | ~$6/piece | Very High | Frame support |
Drawing The Ramp Template
A template helps you cut the curved sides accurately. Use a large piece of plywood or OSB for the sides.
- Mark the base: Draw a straight line for the ramp’s length (for example, 5 feet).
- Mark the height: Draw a perpendicular line at the end, showing the ramp’s height (for example, 20 inches).
- Draw the curve: Use a flexible strip of wood or garden hose to create a smooth curve from the base to the top. Hold it in place and trace along it.
- Check the shape: The curve should be gentle, not too steep or sharp.
Cut two identical side pieces—these form the ramp’s shape.

Credit: www.youtube.com
Building The Frame
The frame is the skeleton of your kicker ramp. It must be strong and even.
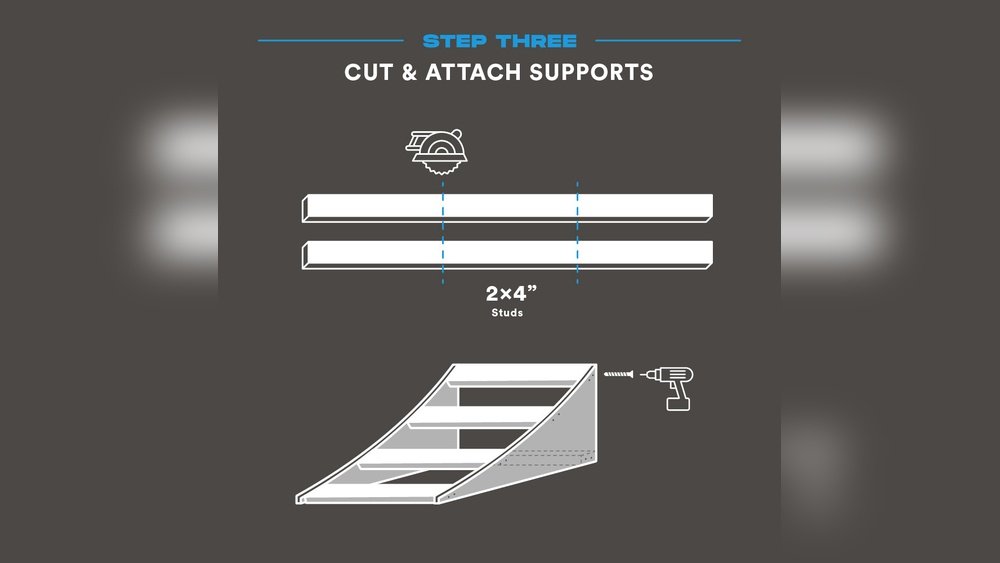
Step-by-step Frame Construction
- Lay out the side pieces: Place the two curved sides parallel, about 3 feet apart.
- Add cross supports: Cut 2x4s to fit between the sides. Place one at the base, one at the top, and 3–4 evenly spaced between.
- Secure with screws: Use 2–3 screws per joint. Make sure everything is square and tight.
- Check stability: Push and shake the frame gently. If it moves, add extra cross supports.
Many beginners forget to check for frame wobble—this is dangerous. If the frame isn’t stable, the ramp won’t be safe.
Attaching The Ramp Surface
The surface is what you ride on. It must be smooth and strong.
How To Attach The Surface
- Cut plywood to size: Use a sheet of exterior plywood, slightly wider than the ramp frame.
- Bend plywood over curve: Start at the base and slowly bend the sheet over the frame. Go slowly to avoid cracking.
- Secure with screws: Place screws every 6–8 inches along each cross support.
- Sand the surface: Use medium-grit sandpaper to remove splinters or rough spots.
- Seal or paint: Apply exterior paint or sealant to protect from rain and wear.
Don’t skip sanding—rough wood can cause injuries and damage wheels.
Adding The Edge And Transition
The edge is where riders launch off. The transition connects the ramp to the ground, making it smoother.
Adding Metal Coping (optional)
If you want smoother tricks:
- Cut metal pipe: Use a steel pipe (about 2″ diameter), cut to ramp width.
- Attach to top edge: Drill holes in the pipe, and screw it to the ramp’s top.
- Check for alignment: Make sure it’s flush with the surface.
Building The Transition
A flat piece of plywood or rubber mat can help the wheels roll smoothly onto the ramp.
- Cut a strip: About 12 inches wide, same width as ramp.
- Attach at base: Screw or glue so it sits flat on the ground.
- Test with wheels: Roll a skateboard or bike to check for bumps.
Many people ignore the transition, but it prevents wheel damage and falls.
Reinforcing And Final Safety Checks
Before using your ramp, reinforce weak spots and do a complete safety check.
- Add extra screws or nails: Especially at joints and edges.
- Install rubber feet: Stops the ramp from sliding during use.
- Check weight limit: Most ramps with 2×4 frames can handle up to 300 lbs. For heavier riders, add more cross supports.
Safety Checklist
- No sharp edges or splinters
- Ramp doesn’t wobble or slide
- Surface is smooth and dry
- Transition is flush with ground
If any part feels unsafe, fix it before riding.
Credit: www.youtube.com
Painting And Weatherproofing
Protecting your ramp from weather extends its life.
- Clean and sand: Remove dust and rough spots.
- Choose exterior paint or sealant: Water-based or oil-based, both work.
- Apply 2–3 coats: Let each coat dry fully.
- Check for coverage: No wood should be exposed.
For outdoor ramps, use sealant with UV protection. Without this, the ramp can rot or warp within a year.
Moving And Storing Your Kicker Ramp
If you want to store or move your ramp, plan ahead.
- Weight: Most ramps weigh 50–80 lbs.
- Handles: Attach handles to the sides for easy carrying.
- Wheels (optional): Small casters can be attached to one side for rolling.
- Storage: Keep ramp dry, out of rain and sun.
Leaving ramps outside shortens their life. Cover with a tarp or store in a garage when not in use.
Advanced Customizations
Once you’ve built a basic kicker ramp, you can make upgrades for better performance.
Adding Skid Plates
Attach thin metal sheets to the base to prevent wood damage when dragging.
Installing Grip Tape
Add grip tape to the surface for extra traction. This helps riders avoid slipping.
Making Modular Ramps
Build two ramps that can be joined together for a longer launch. Use bolts or clamps to connect.
Painting Designs
Customize your ramp with paint, stickers, or artwork. This makes it unique and personal.
Common Mistakes And How To Avoid Them
- Using indoor plywood outdoors: Indoor wood rots quickly. Always use exterior plywood.
- Skipping cross supports: Not enough supports lead to bending or collapse.
- Forgetting to sand: Rough surfaces cause injuries and ruin equipment.
- Ignoring safety checks: Always inspect before riding.
- Not sealing wood: Moisture destroys ramps fast.
| Mistake | Impact | How to Avoid |
|---|---|---|
| Poor material choice | Rot, breakage | Buy exterior-grade plywood |
| Weak frame | Collapse, injury | Add more cross supports |
| Unsealed surface | Short ramp life | Apply sealant or paint |

Credit: www.endlessblading.com
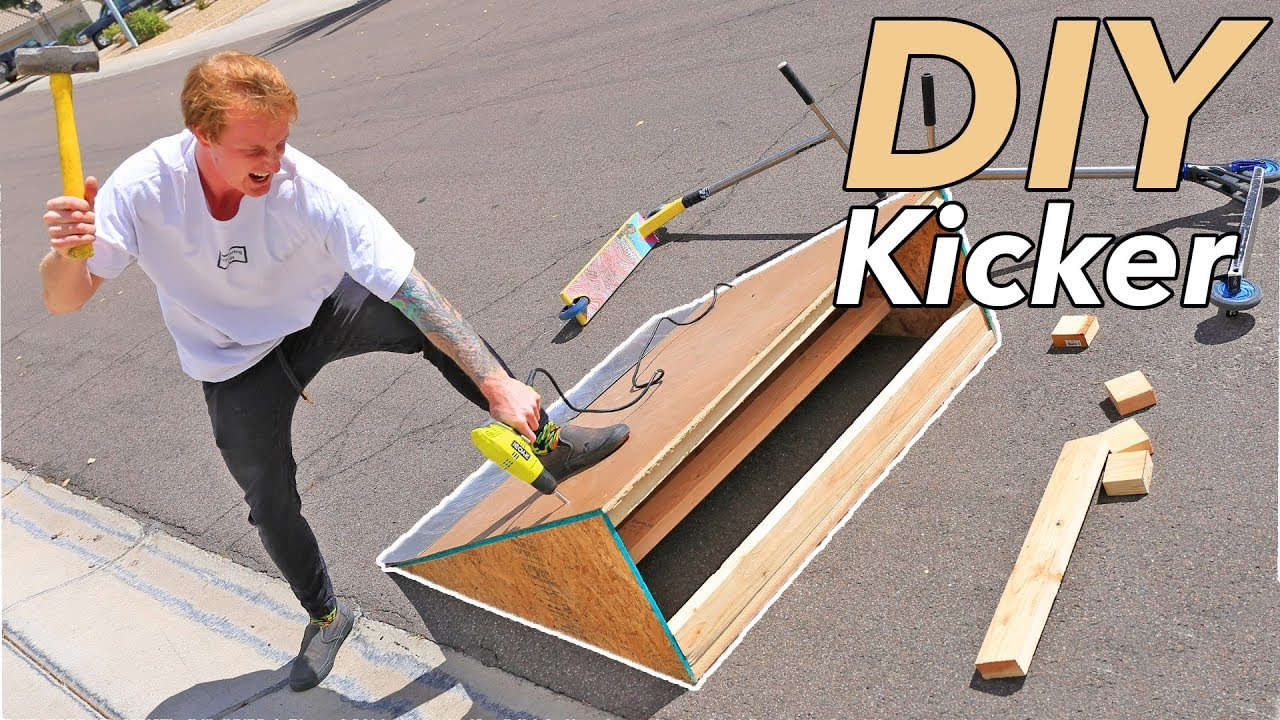
Real-life Example: Building A Kicker Ramp
Let’s walk through a real build for a beginner BMX rider.
- Location: Backyard, concrete driveway
- Size: 20″ high, 5′ long, 3.5′ wide
- Materials: Exterior plywood (1/2″), 2x4s, wood screws, paint
Steps followed:
- Drew template on OSB board, cut two side pieces
- Built frame with 2x4s, checked for wobble
- Bent plywood over frame, secured with screws
- Sanded surface, applied two coats of paint
- Added rubber feet to base, attached a small transition piece
Total cost: $120, time: 5 hours. Ramp lasted two years with regular use and stayed strong after rain thanks to paint.
Practical Tips For Beginners
- Work with a friend: Building is easier and safer with two people.
- Take your time: Rushing leads to mistakes.
- Measure twice, cut once: Avoid wasting wood.
- Test the ramp before jumping: Start with small rides.
- Wear safety gear: Helmet, pads, gloves.
Two insights many beginners miss:
- Frame alignment matters: If sides aren’t parallel, the ramp will feel unstable.
- Transition height: Even a 1-inch gap causes falls—make it flush.
Where To Find Ramp Templates And Inspiration
Many websites offer free ramp templates and design ideas. Look for official skateboarding resources or forums. For extra inspiration, check the Skateboarding page on Wikipedia, which covers ramp types and history.
Frequently Asked Questions
How Long Does It Take To Build A Kicker Ramp?
Usually, a basic kicker ramp takes 4–8 hours to build, depending on your experience and tools. If you prepare materials ahead, you can finish in one day. Painting and sealing add extra drying time.
Can I Use The Ramp Outdoors Year-round?
Yes, but only if you use exterior plywood and seal it well. Outdoor ramps need regular maintenance—check for rot, loose screws, and paint damage. Store indoors when possible to avoid weather problems.
What Is The Best Size For Beginners?
A ramp 16–20 inches high and 4–5 feet long is best for beginners. This size is easier to control and safer for learning jumps. Wider ramps (3–4 feet) give more space for landing.
How Much Weight Can A Homemade Kicker Ramp Support?
Most ramps built with 2×4 frames and quality plywood can support up to 250–300 pounds. For heavier riders or rough use, add extra cross supports and use thicker plywood.
What Tools Do I Need To Build A Kicker Ramp?
You need a saw, drill, measuring tape, screwdriver, sandpaper, and safety glasses. Optional tools like clamps, paintbrushes, or a square can make the job easier and more accurate.
Building your own kicker ramp is rewarding and practical. You save money, learn useful skills, and create a safe, fun place to practice tricks. With careful planning, proper materials, and attention to detail, your ramp will last for years and help you progress.
Always check for safety, customize for your needs, and enjoy every ride!