How to Strap into a Snowboard: Quick Guide for Beginners
Strapping into a snowboard is the first real step before you hit the slopes. For new riders, this process can feel awkward, and even experienced snowboarders sometimes make mistakes. But learning how to do it properly sets the foundation for safe, comfortable, and enjoyable riding.
Whether you’re gearing up at the top of the mountain or just practicing in your backyard, knowing the right way to strap in can help you avoid cold hands, wasted time, and even injuries.
This guide is designed for riders of all levels. You’ll learn step-by-step instructions, how to choose the right location, what gear matters, and common mistakes to avoid. We’ll also cover tips for different types of snowboard bindings, plus some non-obvious tricks that make strapping in easier during real-world conditions.
By the end, you’ll be ready to strap in with confidence—no matter where you ride.
Understanding Snowboard Bindings
Before you strap in, you need to know what you’re working with. Snowboard bindings are the link between your boots and your board. They come in several types, each with their own process for strapping in.
Types Of Bindings
- Strap Bindings – The most common. These use two straps: One over your toe and one over your ankle.
- Rear Entry Bindings – These open at the back. You slide your foot in, then close the highback.
- Step-On Bindings – Newer technology. You step in, and the binding locks automatically.
- Splitboard Bindings – Used for backcountry. These are more technical and require special steps.
Most riders use strap bindings. They offer a secure fit and work with nearly all boots. Rear entry and step-on bindings are faster but may not offer the same fine-tuned adjustment.
Key Binding Parts
- Baseplate – Sits on your board, connects everything.
- Highback – Supports your calf, helps control turns.
- Straps – Hold your boot in place.
- Ratchets/Buckles – Tighten the straps.
- Toe Cap – Covers the toe, adds control.
Knowing these parts helps you understand where your foot goes and what you adjust.
Preparing To Strap In
The right preparation makes strapping in much easier. Here’s what you need to check before you even touch your bindings:
Choose The Right Spot
- Flat area – Always look for a flat spot. This stops your board from sliding away.
- Safe zone – Stay away from crowded areas or the top of steep slopes.
- Lift exit – If strapping in after getting off a lift, move to the side quickly.
Gather Your Gear
- Snowboard boots – Make sure they’re tight and laces are secure.
- Gloves or mittens – Thinner gloves make handling straps easier.
- Snowboard – Check the bindings for ice or snow buildup.
Check Your Equipment
- Bindings – Look for broken parts, loose screws, or ice blocking the buckles.
- Board – Make sure there’s no snow stuck under the bindings.
Position Yourself
- Sit or stand? – Most beginners sit down. Advanced riders often strap in standing up.
- Balance – Keep your board flat on the snow, perpendicular to the slope.
A common mistake is forgetting to clear ice from the bindings. Ice can prevent straps from tightening properly, leading to discomfort or even accidents.
Step-by-step Guide: Strapping Into Strap Bindings
Strap bindings are the standard on most snowboards. Follow these steps for a safe and secure fit.
1. Position Your Board
Place your snowboard flat on the snow. If the slope is steep, dig the edge into the snow to stop it from sliding.
2. Insert Your Lead Foot
Slide your lead foot (usually the left for regular riders, right for goofy) into the binding. Make sure your heel sits all the way back against the highback.
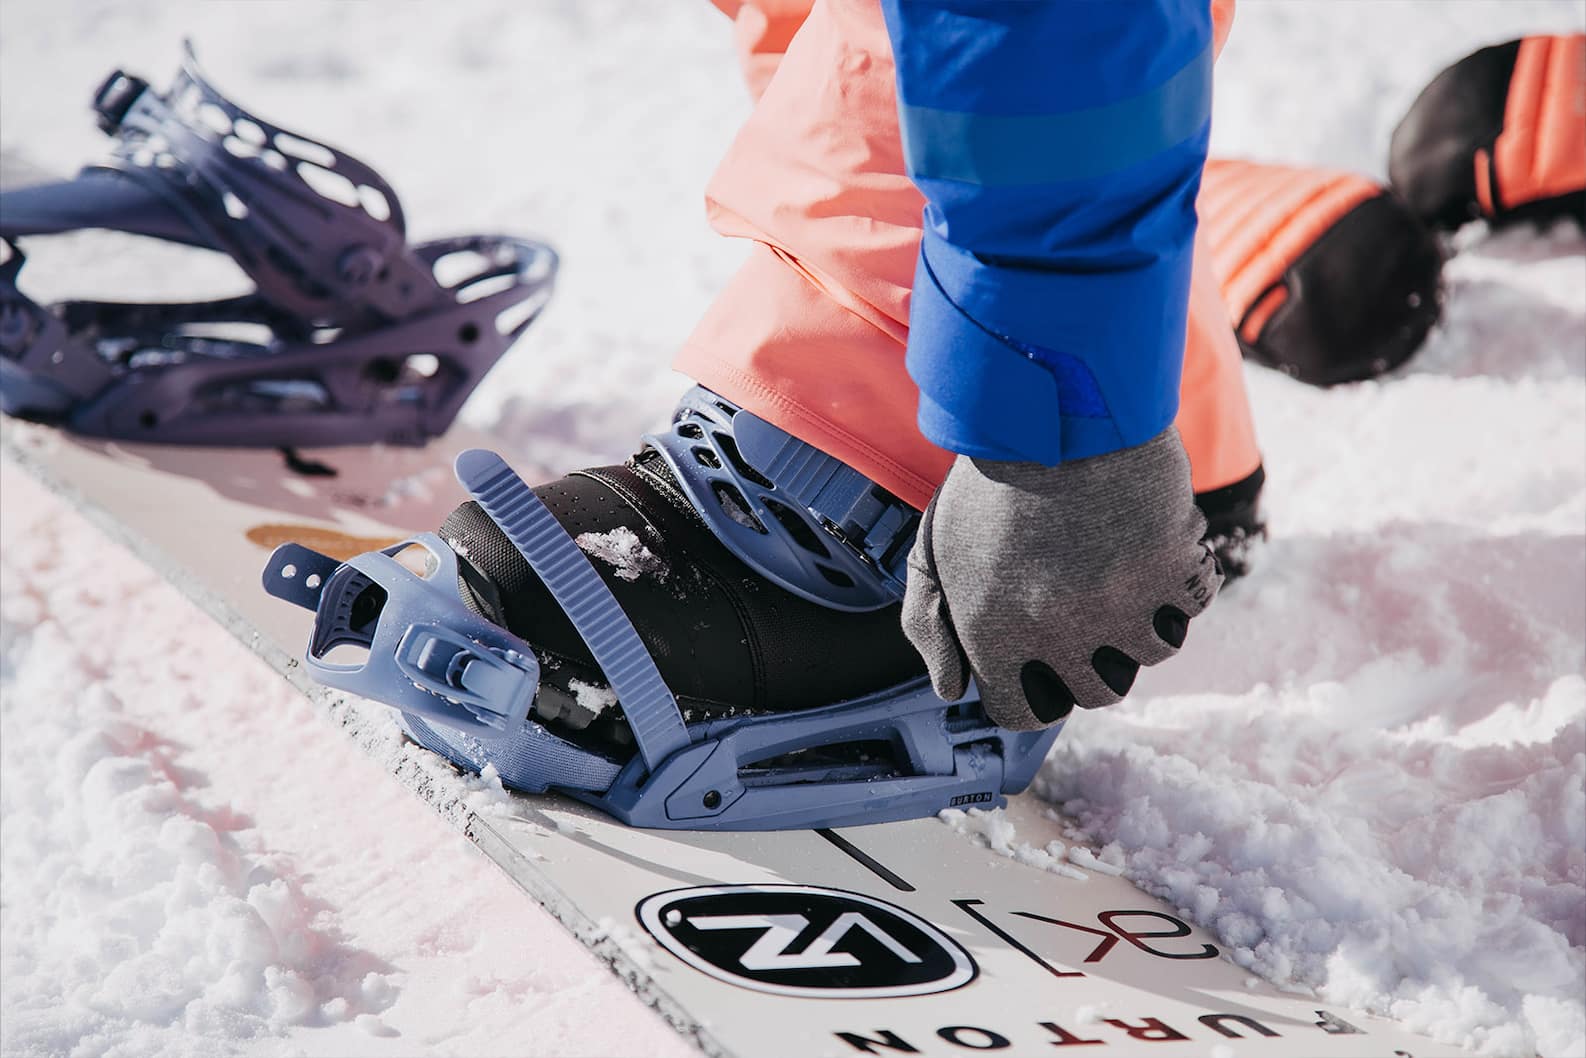
3. Tighten The Toe Strap
Pull the toe strap over the front of your boot. Most modern bindings use a cap style that covers the toe, not just the top.
- Push the strap down until it sits snug.
- Use the ratchet to tighten. It should feel firm but not pinch.
4. Secure The Ankle Strap
Pull the ankle strap over your boot’s ankle area.
- Tighten the ratchet until the strap holds your foot securely.
- Check that your boot doesn’t move inside the binding.
5. Double-check Everything
- Wiggle your foot. If it moves, tighten the straps more.
- Make sure the straps aren’t twisted.
- Try standing up or rocking back and forth.
6. Repeat For The Other Foot
Once you’re ready to ride, strap in your back foot using the same steps.
Some riders strap in their back foot only at the top of the slope, keeping it free for walking or pushing on flat terrain.
7. Stand Up Safely
If you strapped in while sitting, use your hands to push yourself up. Lean forward, keep your weight centered, and avoid twisting your knees.
Strapping In With Rear Entry And Step-on Bindings
Rear Entry Bindings
These are designed for speed. Here’s how to use them:
- Open the highback by pulling the release lever.
- Slide your boot in, making sure the heel is all the way back.
- Push the highback up until it clicks.
- Tighten any extra straps if needed.
Rear entry bindings are popular for rental boards because they make the process quick. But they may not fit all boots perfectly.
Step-on Bindings
Step-on bindings are newer. They work like ski bindings:
- Place your boot over the binding.
- Step down firmly until you hear a click.
- Check that both the toe and heel are locked.
These bindings are fast but require compatible boots and can sometimes collect ice, causing problems.
Comparison Table: Binding Types And Strapping Speed
Here’s a quick look at how long it takes to strap in with different bindings.
| Binding Type | Average Time to Strap In (seconds) | Ease of Use | Boot Compatibility |
|---|---|---|---|
| Strap Bindings | 25–40 | Medium | Most boots |
| Rear Entry | 15–25 | Easy | Some boots |
| Step-On | 10–15 | Very easy | Special boots |
Credit: www.burton.com
Strapping In While Standing: Advanced Tips
Many snowboarders, especially after a few days on the mountain, want to strap in standing up. It’s faster and keeps you dry. Here’s how to do it:
- Place your board perpendicular to the slope.
- Stand with your knees slightly bent.
- Insert your lead foot and hold the board steady.
- Use one hand to pull the toe strap, the other to tighten the ratchet.
- Repeat for the ankle strap.
Some riders use their poles or a nearby fence for balance. If you’re new, practice this on flat ground first. It’s common for beginners to lose balance and fall—don’t worry, it’s part of learning.
Strapping In At The Top Of The Lift
After you exit the chairlift, you’ll need to strap in quickly. Here’s what experienced riders do:
- Move to the side, away from the lift path.
- Place your board flat and dig the edge in.
- Strap in your back foot fast, then stand up.
- Look around before you start riding.
Speed is important here because other riders may be waiting. Don’t block the exit area.
Practical Tips For Easier Strapping
Keeping Your Hands Warm
Cold fingers make strapping in difficult. Use liner gloves under your mittens. Remove only the outer glove for strapping, keeping your liner on.
Clearing Ice And Snow
Ice is the enemy of snowboard bindings. Before you strap in:
- Use your glove or a plastic scraper to clear snow and ice.
- Tap your boot to knock off snow before inserting.
A non-obvious tip: If ice keeps building up, rub a small amount of ski wax on the binding buckles. This stops ice from sticking.
Quick Release Tricks
Some bindings have quick-release systems. Learn how yours works—sometimes there’s a hidden lever or button that speeds up strapping in.
Adjusting Strap Length
If you struggle with the ratchets, check the strap length. Most bindings let you move the straps forward or back. Adjust so they sit flat and don’t pinch.
Comparison Table: Strap Adjustment Vs. Comfort
See how strap settings affect comfort:
| Strap Position | Effect on Comfort | Effect on Control |
|---|---|---|
| Too tight | Painful, numb feet | High control |
| Too loose | Foot moves, less pain | Low control |
| Just right | Comfortable, no pinch | Best control |
Common Mistakes And How To Fix Them
1. Straps Too Loose
Loose straps cause your boots to slide, reducing control. Always tighten until your foot feels secure, but stop before you feel pain.
2. Straps Too Tight
If your feet go numb, the straps are too tight. Loosen them and try again.
3. Twisted Straps
Twisted straps press unevenly on your boot, causing discomfort and poor control. Make sure straps lay flat every time.
4. Not Clearing Ice
Ice blocks the ratchets and prevents proper tightening. Always clear ice before strapping in.
5. Wrong Foot Position
If your heel isn’t all the way back, your boot won’t sit right. Push your heel into the binding before tightening.
6. Unbalanced Board
If your board isn’t flat, it may slide away. Always place your board perpendicular to the slope or dig an edge in.
7. Rushing
Hurrying can lead to mistakes. Take a few extra seconds to check everything.
How Snowboard Boot Type Affects Strapping In
Not all boots are equal. Some are stiff, some are soft, and some fit bindings better than others.
Boot Flex
- Soft boots – Easier to strap in, more comfortable, less control.
- Stiff boots – Harder to fit, more control, better for advanced riders.
Boot Shape
- Wide boots – May not fit all bindings.
- Narrow boots – Can leave gaps, reducing control.
Lacing System
- Traditional laces – Allow for custom tightness, but take longer.
- Boa system – Quick, easy, but may not fit all bindings perfectly.
Comparison Table: Boot Type Vs. Strapping Difficulty
| Boot Type | Strapping Ease | Comfort | Control |
|---|---|---|---|
| Soft, Boa | Easy | High | Medium |
| Stiff, Lace | Medium | Medium | High |
| Wide, Soft | Hard | High | Low |
Strapping In For Kids And Beginners
Children and new riders often need extra help. Their hands are smaller, and they may not have the strength to tighten ratchets. Here’s what works:
- Use bindings with larger buckles.
- Adjust straps for easy reach.
- Adults can help tighten, but teach kids to do it themselves.
A non-obvious tip: If your child struggles, practice at home on carpet. This builds confidence before hitting the mountain.

Credit: www.youtube.com
When To Strap In Both Feet Vs. One Foot
Most snowboarders strap in both feet at the top of a run. But on flat ground or near lifts, some leave one foot free.
- Both feet strapped in – Maximum control, ready to ride.
- One foot free – Easier walking, pushing on flat terrain.
If you’re new, start with both feet strapped in whenever possible. Advanced riders use one-foot techniques for speed and maneuverability.
Safety Considerations
Proper strapping is not just about comfort—it’s about safety. Loose bindings can cause falls, twisted knees, or even injuries.
- Double-check your straps every time.
- If you fall, check your bindings for damage or looseness.
- Teach friends or family how to check each other’s straps.
Some ski resorts report that nearly 20% of beginner falls are due to loose straps or incorrect strapping technique. Don’t be part of that statistic.
Real-world Example: Strapping In During A Snowstorm
Imagine you’re at the top of the mountain, snow blowing hard. Strapping in becomes tricky:
- Find shelter near a tree or fence.
- Clear snow quickly, use your gloves to keep hands warm.
- Take your time—rushing leads to mistakes.
Experienced riders learn to strap in quickly and efficiently even in tough conditions. Practice is key.
Expert Tips For Fast And Comfortable Strapping
- Practice at home – Use your board on carpet to learn the motions.
- Carry a small tool – If your straps loosen or break, a snowboard tool can fix them.
- Check alignment – Make sure your boots are centered in the bindings.
- Use thinner gloves – Easier to handle small parts.
- Wax your bindings – Stops ice from sticking.
When To Replace Or Upgrade Your Bindings
Bindings wear out over time. If you notice any of these signs, consider upgrading:
- Broken buckles or ratchets.
- Straps that won’t tighten.
- Highback that won’t stay upright.
- Cracks in the baseplate.
Modern bindings offer better materials and easier strapping. If your gear is over five years old, it may be time for an upgrade.
For more detailed information on binding technology and safety, visit the Wikipedia Snowboard Binding page.
Frequently Asked Questions
How Tight Should Snowboard Straps Be?
Straps should be tight enough to stop your boot from moving, but not so tight your foot feels numb. You should be able to wiggle your toes, but your heel should stay in place.
Can I Strap In While Standing?
Yes, many riders strap in while standing. Place your board perpendicular to the slope, bend your knees, and use both hands to tighten the straps. Practice on flat ground to build confidence.
Why Do My Straps Keep Loosening?
Loose straps can result from ice buildup, worn ratchets, or incorrect strap adjustment. Clear ice before strapping in, check for damage, and adjust strap length so they sit flat.
What’s The Best Way To Strap In Quickly After Getting Off A Lift?
Move to the side, place your board flat, and use fast motions to tighten both straps. Practice makes this easier. Avoid blocking the lift exit area.
Do I Need Special Boots For Step-on Bindings?
Yes, step-on bindings require compatible boots. Check the manufacturer’s instructions before buying. Standard boots won’t work with step-on systems.
Strapping into a snowboard may seem simple, but doing it right makes a big difference. With practice, the process becomes automatic. Remember to check your gear, use proper technique, and make adjustments for comfort and control. These skills not only save time—they keep you safe and ready to enjoy every run.

Credit: www.youtube.com