The darkslide is a skateboarding trick that involves sliding on the board’s side, specifically the nose or tail, while in motion. It’s a visually striking maneuver that requires a good understanding of balance, board control, and momentum. While it might seem daunting at first, breaking it down into manageable steps can make it achievable for intermediate skaters looking to expand their repertoire.
Mastering the darkslide not only adds a dynamic element to your skating but also hones crucial skills applicable to many other tricks.
Key Takeaways
- The darkslide is a fundamental sliding trick where the board slides on its side (nose or tail).
- Proper preparation is crucial, including understanding your board setup, finding a suitable location, and wearing protective gear.
- Key components of learning the darkslide involve mastering balance, controlling speed, and executing the slide itself.
- The process can be broken down into distinct phases: Approaching the obstacle, initiating the slide, maintaining the slide, and recovering from the slide.
- Common challenges include sticking the slide, losing balance, and incorrect board placement, all of which can be overcome with practice and specific drills.
- Progression involves practicing on different surfaces, increasing speed, and eventually incorporating the darkslide into lines or combinations.

Credit: www.youtube.com
Understanding The Darkslide: Mechanics And Prerequisites
The darkslide, at its core, is an advanced variation of a slide trick. Unlike a powerslide where you slide on the wheels, a darkslide involves deliberately placing the board onto its side, typically the nose or tail, and sliding along a surface.
This requires a significant amount of commitment and control. It’s not a trick you’d typically learn as a beginner; rather, it’s a natural progression for skaters who have a solid grasp of fundamental tricks like ollies, manuals, and basic slides.
Before even attempting a darkslide, a skater needs to have a strong foundation in balance and board control. This means feeling comfortable riding at moderate speeds, being able to make quick adjustments, and having a good sense of how the board reacts to weight shifts. The ability to ollie consistently is also paramount, as the trick often involves an ollie to initiate the slide or to get onto an obstacle. Understanding how to carve and control your momentum is equally important, as it allows you to approach the slide with the right speed and angle.
Board Setup For Darkslides
The type of skateboard you ride can significantly impact your ability to perform a darkslide. While most standard skateboards can be used, certain setups might offer advantages.
- Deck: A deck with a good concave can help with board control during the slide. The shape and size of the deck are less critical than its overall responsiveness. For a detailed guide on choosing the right deck, check out our How to Choose a Skateboard Deck: Expert Tips for Perfect Fit.
- Trucks: The tightness of your trucks plays a role. Looser trucks offer more turnability, which can be helpful for initiating the slide, but they can also make the board less stable during the slide itself. Tighter trucks provide more stability but require more effort to initiate turns. Many skaters find a medium tightness to be the sweet spot.
- Wheels: The size and hardness of your wheels are crucial. Smaller, harder wheels are generally preferred for tricks like the darkslide. Harder wheels (e.g., 99a or 101a) slide more easily and consistently. Smaller wheels keep the board closer to the ground, which can make initiating the slide easier and reduce the risk of the board flipping out from under you.
- Wax: For sliding on ledges or rails, applying skateboard wax is essential. Wax reduces friction, allowing the board to slide smoothly. Without wax, you’ll likely just scrape your board and get stuck.
Choosing The Right Location And Gear
Safety and suitability of the location are paramount when learning a new trick, especially one as advanced as the darkslide.
- Surface: A smooth, flat, and slightly abrasive surface is ideal. Concrete skateparks, smooth asphalt, or even a clean, dry basketball court can work. Avoid rough surfaces, gravel, or anything that could catch your wheels or board and cause a fall. For practicing on ledges, ensure the ledge is smooth and well-waxed.
- Obstacles: Initially, practicing the darkslide without an obstacle on a flat surface can help you get the feel for the slide. Once you’re comfortable, you can progress to sliding over small, smooth obstacles like curbs or low ledges.
- Protective Gear: Always wear protective gear. This includes a helmet, knee pads, elbow pads, and wrist guards. Falls are inevitable when learning new tricks, and proper gear can significantly reduce the risk of injury. You can find more information on essential safety equipment in our What to Wear for Skateboarding: Essential Gear and Style Tips.
Mastering The Fundamentals: Balance And Board Control
Before diving into the darkslide, ensure you have a solid grip on fundamental skateboarding skills. These skills are the bedrock upon which advanced tricks are built.
Developing Essential Balance
Balance on a skateboard isn’t just about staying upright; it’s about actively maintaining stability while in motion and responding to changes in terrain and board dynamics.
- Riding Comfortably: Be at ease riding at various speeds, from a slow roll to a moderate pace. This involves keeping your knees bent, your weight centered over the board, and your arms out for counter-balance.
- Weight Distribution: Learn to shift your weight subtly to control turns and maintain stability. This is crucial for initiating the slide and recovering from it. Practicing manuals, where you balance on the back wheels, can significantly improve your rear-foot balance.
- Core Strength: A strong core is vital for overall balance. Engaging your core muscles helps stabilize your body and allows for more precise movements. Activities like yoga or Pilates can complement skateboarding training.
Enhancing Board Control
Board control is the ability to manipulate your skateboard precisely. This includes steering, stopping, and adjusting your position on the deck.
- Carving: Practice carving deep turns in both directions. This helps you understand how to use your body weight to steer the board and control your momentum.
- Foot Placement: Experiment with different foot placements. For darkslides, you’ll need to be able to quickly adjust your feet to initiate the slide and then reposition them for recovery.
- Ollie Proficiency: A consistent ollie is often necessary to get the board into the right position for a darkslide, especially when sliding over obstacles. Practice ollieing onto different surfaces and maintaining balance after landing. If you’re looking to improve your ollie, consider resources on Easy Skateboard Tricks for Beginners which often start with mastering the ollie.
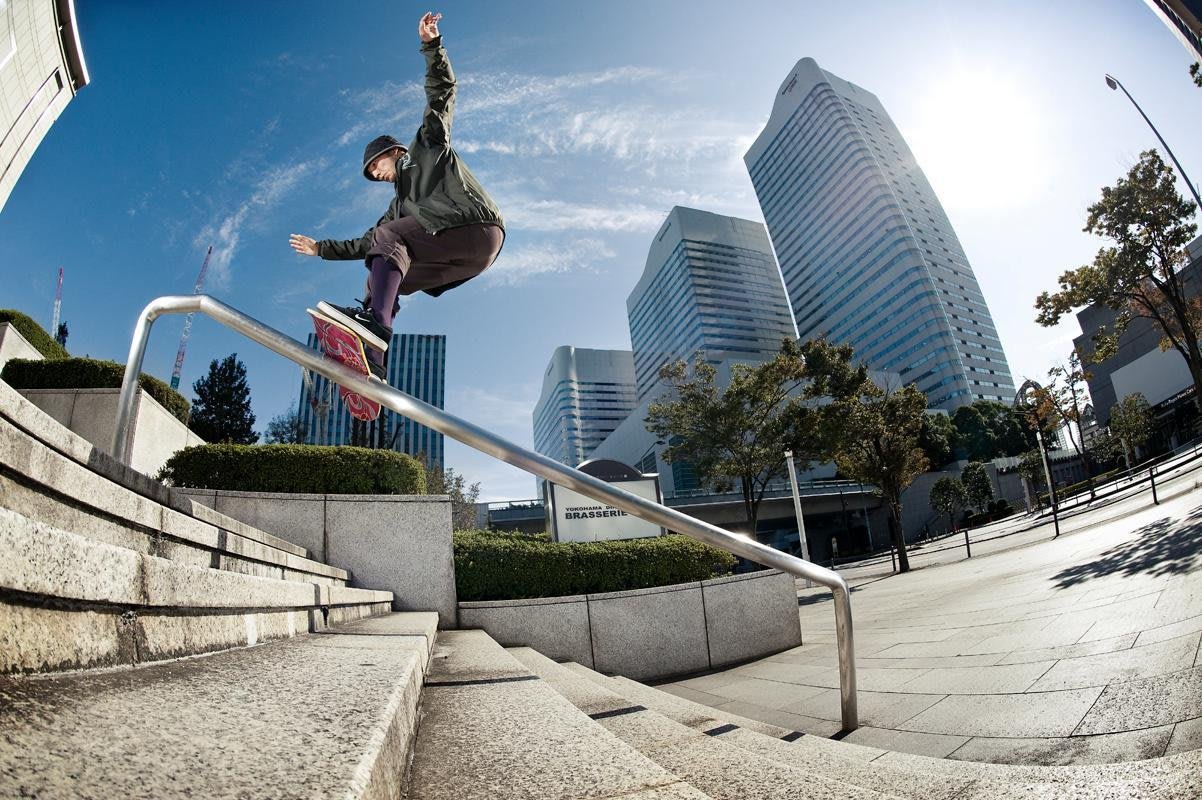
Credit: www.redbull.com
Step-by-step Guide To Performing The Darkslide
Learning the darkslide can be broken down into several key stages. It’s a trick that requires repetition and patience, focusing on each component before trying to put it all together.
Phase 1: Approaching And Setting Up
The approach is critical for setting the right speed and angle.
- Gain Speed: Start with a comfortable, moderate speed. Too slow, and you won’t have enough momentum to slide. Too fast, and you might lose control.
- Position Your Feet: Place your front foot slightly behind the front bolts, angled slightly forward. Your back foot should be on the tail, ready to pop or lift.
- Target Identification: If sliding over an obstacle (like a curb or ledge), identify the precise point where you want to initiate the slide.
Phase 2: Initiating The Slide
This is where the magic happens, getting the board onto its side.
- The Ollie (or Lift): For a darkslide over an obstacle, you’ll typically ollie just before reaching it. For a flatground darkslide, you might perform a slight ollie or simply lift the nose/tail using your back foot.
- Board Rotation: As the board reaches the apex of its ollie (or as you lift it), use your back foot to twist the board sideways. The goal is to get the board to land on its side, either the nose or tail.
- Weight Transfer: Simultaneously, shift your weight onto the side of the board that is about to make contact with the ground. This is a crucial weight transfer that helps guide the board into the slide.
Phase 3: Executing The Slide
Once the board is on its side, the focus shifts to maintaining balance and control.
- Board Placement: Aim for the board to land on its side, parallel to the direction of travel. The pressure should be distributed evenly across the side of the deck.
- Body Position: Keep your knees bent and your weight low. Your body should be centered over the board, anticipating any shifts or wobbles.
- Maintaining Momentum: Continue rolling forward. The slide should feel smooth. If it feels jerky or you’re sticking, your speed, angle, or the surface might be the issue.
- Slide Length: The duration of the slide depends on your speed, the surface, and how well you’re balanced. Initially, aim for short, controlled slides.
Phase 4: Recovering From The Slide
The end of the slide is as important as the beginning.
- Prepare for Landing: As you feel the slide coming to an end, prepare to bring the board back onto its wheels.
- Weight Shift Back: Shift your weight slightly back towards the center of the board.
- Board Re-Leveling: Use a subtle push or shift with your feet to level the board back onto its wheels. This often happens naturally as friction increases.
- Roll Away: Land with bent knees, ready to continue riding.

Credit: www.jenkemmag.com
Common Challenges And How To Overcome Them
Learning the darkslide is a process, and encountering difficulties is part of the learning curve. Understanding common problems can help you troubleshoot and progress faster.
Sticking The Slide
This is when the board stops abruptly on its side, often leading to a fall.
- Causes: Insufficient speed, wrong angle of approach, rough surface, lack of wax (on ledges/rails), or uneven pressure on the board.
- Solutions:
- Increase Speed: Ensure you have enough momentum.
- Wax Up: If on a ledge, apply plenty of wax.
- Smoother Surface: Find a more forgiving surface.
- Adjust Angle: Experiment with approaching at a slightly different angle.
- Board Placement: Focus on landing the board flat on its side, not at an awkward angle.
Losing Balance
Maintaining balance during the slide and recovery is crucial.
- Causes: Incorrect weight distribution, stiff legs, looking down at the board instead of ahead, or trying to slide too long.
- Solutions:
- Bend Knees: Keep your knees deeply bent to lower your center of gravity.
- Look Ahead: Focus your gaze in the direction you want to go, not down at your feet.
- Controlled Slides: Start with short, manageable slides. Don’t try to slide for an extended period until you’re comfortable.
- Active Core: Engage your core muscles for stability.
Incorrect Board Positioning
Getting the board to land and slide on its side correctly can be tricky.
- Causes: Not twisting the board enough, twisting too much, or initiating the twist too late/early.
- Solutions:
- Practice the Twist: On flat ground, practice ollieing and twisting the board without sliding. Get a feel for how much force and timing are needed.
- Weight Shift Timing: Ensure your weight transfer happens as the board is rotating and preparing to land on its side.
- Board Angle: Aim for the board to be as parallel to the ground as possible on its side.
The Board Flipping Out
Sometimes, instead of sliding, the board can flip over or sideways unexpectedly.
- Causes: Too much force applied to one edge, landing on an uneven edge, or losing control of the board’s rotation.
- Solutions:
- Gentle Initiation: Avoid overly aggressive movements when twisting the board.
- Even Pressure: Focus on distributing pressure evenly across the board’s side during the slide.
- Practice Flat: Spend time on flat ground to get the feel for the board’s movement before attempting on obstacles.
Progression And Advanced Techniques
Once you can consistently perform a basic darkslide, you can start to push your skills further.
Darksliding Over Obstacles
This is a common progression from flatground darkslides.
- Curbs and Ledges: Start with low, smooth curbs or ledges. The principle is similar to a flatground darkslide, but you’ll need to ollie over the obstacle. The key is to time your ollie and twist so that the board lands on its side on top of the obstacle and slides across.
- Rails: Sliding on rails requires significant wax and precise board placement. The board needs to land perfectly on its side edge and slide along the rail. This is a much more advanced variation.
Incorporating Into Lines And Combinations
True mastery comes when you can seamlessly link the darkslide with other tricks.
- Manual to Darkslide: Ride into a manual, then pop into a darkslide.
- Darkslide to Manual/Grind: Perform a darkslide and transition back onto the wheels to continue riding, or even into a grind.
- Flip Tricks into Darkslides: While extremely difficult, some pros can ollie, flip the board, and then darkslide.
Variations Of The Darkslide
- Nose Slide vs. Tail Slide: While often used interchangeably, a darkslide technically refers to sliding on the nose or tail side. Some skaters differentiate between a nose slide (sliding on the nose) and a tail slide (sliding on the tail). The technique is largely the same, just focused on either the front or back of the board.
- Manual Darkslide: This involves performing a manual and then transitioning into a darkslide without touching the ground with the wheels.
Examples And Real-world Application
Seeing the darkslide in action can be inspiring and informative. While specific statistics on darkslide prevalence are scarce, its presence in skate videos and competitions highlights its importance.
Pro Skater Examples
Many professional skateboarders have showcased impressive darkslides. For instance, riders like Shane O’Neill and Luan Oliveira have incorporated darkslides into their video parts, often sliding over significant obstacles or in highly technical lines. Watching their technique, particularly their footwork and board control, can provide valuable insights.
These are skaters who have dedicated years to refining their skills, demonstrating the level of practice required.
Learning From Skate Videos
Analyzing professional skate videos is an excellent way to understand the nuances of the darkslide. Pay attention to:
- Approach Speed and Angle: How do they set up for the slide?
- Foot Placement: Where are their feet positioned before, during, and after the slide?
- Board Rotation: How do they twist the board?
- Body English: How do they use their body to maintain balance?
Case Study: The Evolution Of Sliding Tricks
The darkslide is part of a broader family of sliding tricks that have evolved over skateboarding’s history. Early skaters experimented with grinding and sliding on ledges and rails, pushing the boundaries of what was thought possible. Tricks like the 50-50 grind, nosegrind, and various lipslides paved the way for more complex maneuvers.
The darkslide, requiring a deliberate shift from rolling to sliding on the board’s side, represents a significant step in this evolution, demanding a deeper level of board manipulation and commitment.
Skateboarding For Well-being And Skill Development
Learning tricks like the darkslide contributes significantly to a skater’s overall development, impacting both physical and mental well-being. The Benefits of Skateboarding are numerous, extending beyond just trick acquisition.
Physical Benefits
- Balance and Coordination: Advanced tricks like the darkslide demand and dramatically improve balance, proprioception, and fine motor skills.
- Leg Strength and Core Power: The constant engagement of leg muscles for riding, jumping, and absorbing impact, along with core strength for stability, builds physical resilience.
- Cardiovascular Health: Riding a skateboard, especially when practicing tricks, provides a good cardiovascular workout.
Mental Benefits
- Problem-Solving: Learning a complex trick like the darkslide involves breaking down a problem, experimenting with solutions, and persevering through failures. This fosters critical thinking and resilience.
- Patience and Persistence: Mastering the darkslide requires significant patience. Skaters learn to accept setbacks, celebrate small victories, and understand that progress is often incremental. This aligns with the broader benefits discussed in Why Skateboarding is Good for Mental Health: Boost Your Wellbeing.
- Confidence Building: Successfully landing a difficult trick like the darkslide provides a substantial boost in self-confidence. Each conquered challenge reinforces a sense of accomplishment.
- Stress Relief: The focused nature of skateboarding can be a powerful form of stress relief, allowing skaters to immerse themselves in the present moment and forget daily worries.
Frequently Asked Questions
What Is The Difference Between A Darkslide And A Powerslide?
A powerslide is a maneuver where a skater intentionally slides on their wheels to slow down or change direction. It typically involves a 90-degree turn and a controlled slide on the wheels. A darkslide, on the other hand, involves sliding on the side of the skateboard deck, specifically the nose or tail, rather than the wheels. It’s a more advanced trick that requires positioning the board onto its edge and sliding.
How Long Does It Take To Learn A Darkslide?
The time it takes to learn a darkslide varies greatly depending on a skater’s existing skill level, dedication, and practice frequency. For someone who is already comfortable with ollies, manuals, and basic slides, it might take anywhere from a few sessions to a couple of weeks of consistent practice.
For skaters with less experience, it could take significantly longer. Patience and consistent effort are key.
Can I Learn Darkslides On A Longboard?
While the fundamental principle of sliding on the side of the deck applies, darkslides as typically performed on a skateboard are not a common or practical trick on a longboard. Longboards are designed for stability and cruising, and their larger size, softer wheels, and different deck shapes make them less suited for the precise, agile movements required for a darkslide.
Longboarders have their own set of sliding techniques, like downhill slides (e. g. , Coleman slide, toeside slide), which are different in execution and purpose.
What Are The Most Common Mistakes Beginners Make When Learning Darkslides?
The most common mistakes include:
- Insufficient Speed: Not having enough momentum to slide.
- Incorrect Weight Transfer: Not shifting weight onto the board’s side properly.
- Stiff Legs: Not bending knees enough, leading to poor balance.
- Looking Down: Focusing on the board instead of the path ahead.
- Over-Twisting or Under-Twisting: Not getting the board onto its side correctly.
- Rough Surface: Attempting on surfaces that are too abrasive or uneven.
Is The Darkslide A Useful Trick In Skateboarding?
Yes, the darkslide is considered a valuable trick, particularly for intermediate and advanced skaters. It demonstrates a high level of board control and creativity. While it might not be as frequently used in competitive street skateboarding as grinds or flip tricks, it’s a visually impressive maneuver that adds style and complexity to a skater’s repertoire.
It’s also a foundational trick for learning more advanced variations and combinations.
The journey of learning a trick like the darkslide is a microcosm of the broader skateboarding experience. It’s about pushing your limits, embracing challenges, and finding joy in the process of improvement. Each successful slide, no matter how small, builds confidence and refines your connection with your board.
Whether you’re aiming to land a darkslide on flat ground or incorporate it into a complex line, the dedication and practice involved offer rewards that extend far beyond the trick itself, contributing to physical fitness, mental resilience, and a deeper appreciation for the art of skateboarding.