How to Ollie on a Skateboard: Master the Basics Fast
Learning how to ollie on a skateboard can feel like unlocking a new world. The ollie is the most important trick in street skateboarding. It’s the foundation for hundreds of other tricks, and it’s often the first move every skater wants to master. But if you’re just starting, the ollie can seem confusing or even impossible. The good news is, with the right steps and practice, anyone can learn to ollie. Let’s break down the process and give you all the tips and details you need to land your first ollie.
What Is An Ollie And Why Is It Important?
The ollie is a skateboarding trick where the rider and board leap into the air without grabbing the board. Invented by Alan “Ollie” Gelfand in the late 1970s, this trick changed skateboarding forever. The ollie lets you hop over obstacles, onto ledges, and start other tricks like kickflips or heelflips. Whether you want to skate in the streets, at the park, or even try some ramps, the ollie is your first big milestone.
A surprising fact: Over 90% of street tricks start with an ollie. Even experienced skaters spend time perfecting their ollies for height, control, and style.
The Gear You Need For Ollies
Before you try to ollie, it’s important to have the right equipment. Good gear makes learning safer and easier.
Skateboard Setup
- Deck size: For most beginners, a board between 7.75” and 8.25” wide is ideal.
- Trucks: Should match the width of your deck.
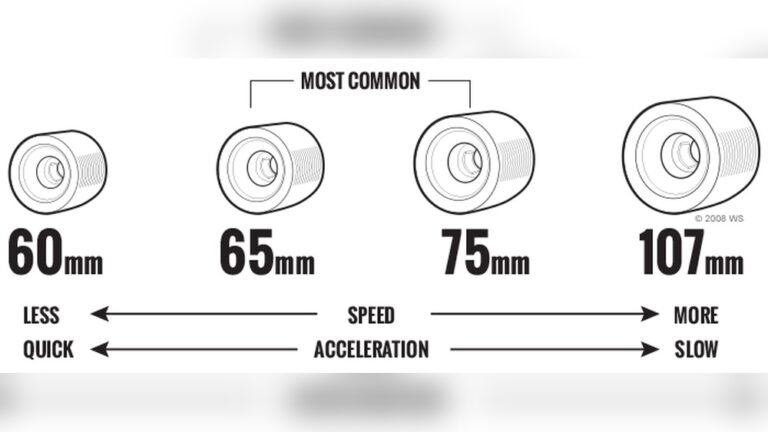
- Wheels: Softer wheels (around 90A) grip better and can make learning on rough ground easier.
- Grip tape: Gives you the friction needed to slide your foot.
- Shoes: Flat-soled skate shoes help you control the board and protect your feet.
Safety Gear
- Helmet: Always wear one, especially when learning.
- Knee and elbow pads: Prevent cuts and bruises.
- Wrist guards: Skateboarding falls often hurt wrists.
Many new skaters skip pads, but that’s a common mistake. Pads make it easier to practice longer without injury.

Credit: www.youtube.com
Understanding The Ollie: The Science And The Motion
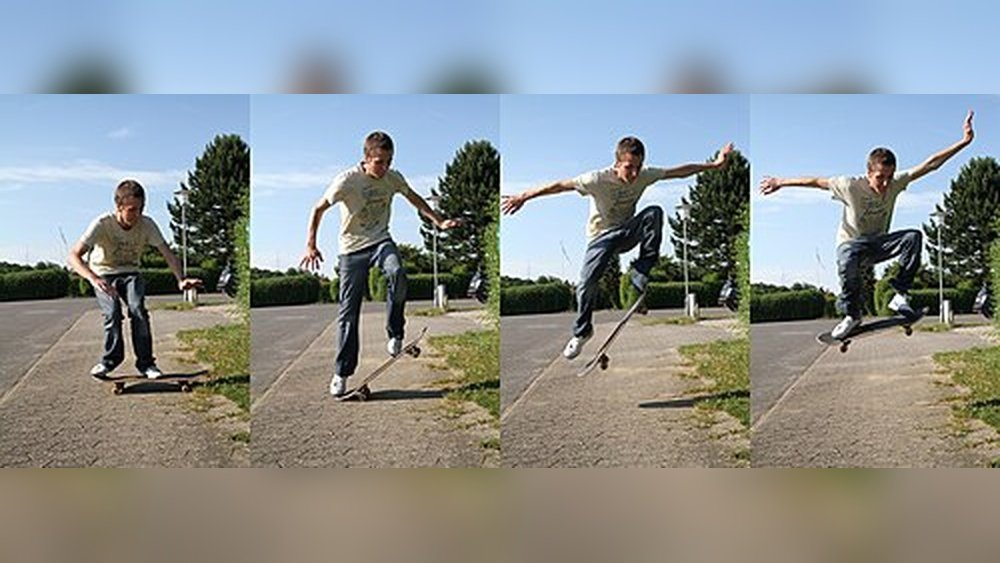
The ollie works thanks to physics. When you pop the tail, the skateboard snaps against the ground and jumps up. At the same time, your front foot slides upward, pulling the board higher with friction from the grip tape.
Let’s see how the ollie compares to other skateboarding basics:
| Trick | Board Leaves Ground? | Hands Used? | Difficulty (1-10) |
|---|---|---|---|
| Ollie | Yes | No | 6 |
| Manual | No | No | 4 |
| Kickturn | No | No | 3 |
| Shuvit | Yes | No | 7 |
Most beginners find that the ollie is the first trick where the board leaves the ground without using hands. That’s why it feels so special—and so challenging.
Step-by-step Guide: How To Ollie On A Skateboard
Let’s break down the ollie into simple, clear steps. Each part matters, so don’t rush. Take time with each stage, and practice until it feels natural.
1. Stance And Foot Placement
- Back foot: Place the ball of your back foot on the skateboard’s tail (the curved end).
- Front foot: Place your front foot near the middle of the board, angled slightly, with your toes just behind the front bolts.
Your shoulders should be parallel to the board, knees slightly bent, and body relaxed.
2. The Pop
Bend your knees deeper. Push down hard and fast with your back foot, snapping the tail against the ground. This “pop” is what lifts the board.
Pro tip: Try practicing the pop while standing still, just to get used to the feeling.
3. The Slide
As soon as you pop the tail, drag the side of your front foot (usually the outside edge of your shoe) quickly up the grip tape toward the nose (front) of the board. This motion levels out the board and helps it rise higher.
- Don’t kick straight forward—slide your foot up at an angle.
- The faster and smoother you slide, the higher the ollie.
4. The Jump
At the same time as you pop and slide, jump up with your body. The goal is to lift your knees toward your chest. Don’t push the board down with your feet. Instead, let the board stick to your feet as you rise.
5. Leveling Out
As your board reaches its highest point, suck both knees up and keep your feet over the bolts. Your front foot should have leveled out the board so it’s flat in the air.
6. The Landing
Prepare to land with your knees slightly bent to absorb the impact. Land over the bolts (where the trucks attach to the deck) to avoid breaking your board. Try to keep your balance centered as you roll away.
Here’s a quick summary of the ollie sequence:
| Step | Main Motion | Key Tip |
|---|---|---|
| Stance | Set feet and posture | Keep shoulders parallel |
| Pop | Snap tail down | Use back foot’s ball |
| Slide | Drag front foot up | Angle foot, don’t kick |
| Jump | Jump up and suck knees | Let board rise with you |
| Land | Absorb and balance | Land over bolts |
Common Ollie Mistakes And How To Fix Them
Almost every skater struggles with the ollie at first. Recognizing common errors can save you weeks of frustration.
Not Popping Hard Enough
If the board barely leaves the ground, you might not be snapping the tail forcefully. Focus on a quick, strong pop with your back foot. Practice just popping until you hear a loud “snap” sound.
Not Sliding The Front Foot
Some beginners try to jump without sliding their foot. The slide is what lifts and levels the board. Practice sliding your front foot even without trying the full jump.
Leaning Too Far Forward Or Back
Leaning too far in either direction can cause you to fall or the board to shoot out. Keep your weight centered over the board, with shoulders and hips aligned.
Kicking Instead Of Sliding
Don’t “kick” your front foot off the board. Instead, slide it up the grip tape. If your foot flies off, slow down and focus on the sliding motion.
Not Committing
Fear is normal, but not committing can hold you back. Try ollies on grass or carpet first. This helps you get comfortable with the motions without the board rolling away.
Practicing Safely: Where And How To Train Your Ollie
Where you practice your ollies makes a big difference in how quickly you learn. Here are a few safe options:
- Grass or carpet: The board won’t roll away. Great for learning the motions.
- Flat, smooth concrete: Once you’re comfortable, move to real ground.
- Near a wall or fence: Hold on with one hand to practice popping and sliding.
Practice tip: Break the ollie into parts. Try just popping. Then just sliding. Then combine them. Most skaters need a few hundred tries to get their first clean ollie, so don’t get discouraged.

Credit: howtoskate.com.au
How Long Does It Take To Learn An Ollie?
Every skater learns at their own pace. On average, beginners need 2-4 weeks of regular practice (20–30 minutes daily) to land their first ollie while rolling. Mastering higher, more controlled ollies can take several months or longer.
Some skaters learn faster by practicing every day, watching slow-motion tutorials, and filming themselves to spot mistakes.
Advanced Ollie Tips: Going Higher And Farther
Once you land your first ollie, the next challenge is getting more height and distance. Here’s what makes a difference:
- Faster pop: The harder and quicker you pop, the higher you go.
- Quicker slide: The more forcefully you slide your front foot, the more the board rises.
- Knee tuck: Pull your knees up toward your chest in the air.
- Practice over objects: Try ollieing over small sticks or boards to build confidence.
Many skaters get stuck at a low ollie height. Often, it’s because they don’t pull their knees up enough or hesitate during the pop. Film your ollie in slow motion, if possible, to see where you can improve.
Essential Exercises To Improve Your Ollie
Skateboarding is more physical than many people think. Strengthening your legs and practicing certain movements off the board can speed up progress.
- Squats: Build leg strength and balance.
- Box jumps: Teach your body to jump higher.
- Balance board: Improves stability.
- Ankle mobility drills: Prevents injury and improves control.
Practicing these exercises a few times a week can help you pop higher and land more solidly.
Comparing Ollie Progress: Beginner To Advanced
It’s helpful to know what’s normal as you improve. Here’s a quick look at typical ollie progress:
| Skill Level | Ollie Height (inches) | Success Rate (%) | Typical Time Practicing |
|---|---|---|---|
| Beginner | 1–3 | 20–40 | 0–3 months |
| Intermediate | 4–8 | 60–80 | 3–12 months |
| Advanced | 9–15 | 90+ | 1+ years |
Don’t compare yourself too much to others. Everyone progresses at a different rate, but regular practice always pays off.

Credit: www.wikihow.com
Two Non-obvious Insights Most Beginners Miss
- Footwear matters more than you think: The right skate shoes make a huge difference. Shoes with a flat sole and good grip give you better control and protect your toes from “flick burns.” Many beginners struggle with ollies simply because they’re wearing running shoes or shoes with thick soles.
- Practicing still vs. rolling: Most skaters learn ollies while standing still, but it actually helps to start trying them while rolling slowly. The motion of the board as you roll makes the pop and slide feel more natural and prepares you for real tricks.
When To Try Ollies Down Curbs Or Over Obstacles
Once you can ollie while rolling, you’ll want to start using your new skill. Begin with small curbs or cracks in the sidewalk. Always check your landing spot for rocks or debris.
- Start small: Try hopping over a stick or painted line.
- Use a friend: Have someone mark your best ollie with chalk so you can see progress.
- Film yourself: Watching your own ollies helps spot what to fix.
Never rush to big stairs or gaps until you’re confident. Injuries often happen when skaters try too much, too soon.
Frequently Asked Questions
How Long Does It Take To Learn To Ollie?
Most beginners need 2–4 weeks of regular practice to land their first ollie while rolling. Some learn faster, some slower. Consistency and practicing the correct steps are more important than raw talent.
Why Won’t My Skateboard Stick To My Feet?
The board sticks because of the slide and friction from your front foot. If your board isn’t following your feet, you may not be sliding hard enough or your foot position might be off. Try focusing on a quick, strong slide and make sure your shoes have enough grip.
Is It Easier To Learn The Ollie On Grass Or Concrete?
Learning on grass or carpet can be easier because the board won’t roll away. However, once you learn the motions, you should move to smooth concrete, as the pop and slide feel slightly different on real skate surfaces.
How High Should My First Ollie Be?
Most first ollies are 1–2 inches off the ground. That’s normal! With more practice, you’ll reach 4–6 inches, and advanced skaters can ollie over a foot high. Focus on technique, not height, at first.
Are There Any Good Video Tutorials For Ollies?
Yes, there are many step-by-step guides online. One reliable place to start is the Wikipedia ollie article, which includes history, physics, and links to instructional videos.
Mastering the ollie opens up new possibilities in skateboarding. Remember, every skater falls and fails before they land it. Practice regularly, focus on technique, protect yourself with the right gear, and don’t give up. Your first ollie is just the beginning—enjoy the journey!