How to Clean Skateboard Bearings: Easy Steps for Smooth Rides
A skateboard’s smooth ride depends on more than just a good deck or grippy wheels. One often-overlooked part is the bearings. These small metal rings, fitted inside each wheel, help the wheels spin freely. Over time, dirt, water, and grime can slow them down or even cause damage. Learning how to clean skateboard bearings is a practical skill every skater should have. It’s not hard, but doing it right makes your board faster, quieter, and safer.
Let’s break down how to clean skateboard bearings step by step, what tools you’ll need, and some common mistakes beginners make. With proper care, you can extend the life of your bearings and enjoy a smoother ride.
Why Clean Skateboard Bearings?
Bearings might seem like a small detail, but they have a big impact. Dirty bearings can make your board feel sluggish and noisy. In some cases, they might even seize up, making it impossible to ride. Here are a few reasons to keep bearings clean:
- Performance: Clean bearings reduce friction, so you roll further with each push.
- Durability: Removing dirt and moisture helps prevent rust and wear.
- Cost-Effective: Cleaning is much cheaper than buying new bearings.
A recent survey by the International Association of Skateboard Companies found that skaters who clean their bearings every 1-2 months replace them 30% less often compared to those who don’t. That’s real savings and better performance over time.
What You’ll Need: Tools And Supplies
Cleaning bearings doesn’t require fancy equipment, but having the right tools makes the job easier. Here’s what you should have ready:
- Skate tool or wrench for wheel removal
- Small flathead screwdriver or pin (to remove bearing shields)
- Bowl or cup for soaking bearings
- Cleaning solution: Isopropyl alcohol (90% or higher), acetone, or a commercial bearing cleaner
- Old toothbrush or small brush
- Lint-free cloth or paper towels
- Lubricant: Skate-specific bearing oil or light machine oil
- Rubber gloves (optional, for handling cleaning chemicals)
Quick Comparison: Cleaning Solutions
Choosing the right cleaner matters. Here’s a look at common options:
| Cleaning Solution | Pros | Cons |
|---|---|---|
| Isopropyl Alcohol (90%+) | Dries fast, widely available, safe on metal | Can be expensive, lower strengths leave residue |
| Acetone | Very effective at removing grease and dirt | Strong fumes, flammable, harsh on skin/plastic |
| Commercial Bearing Cleaner | Formulated for bearings, safe on rubber/plastic | Usually more costly |
Avoid WD-40 or other household oils—they’re not made for skateboard bearings and can attract more dirt.

Credit: www.tactics.com
Step-by-step: How To Clean Skateboard Bearings
This process takes about 30–45 minutes, but can make a big difference in how your board rides.
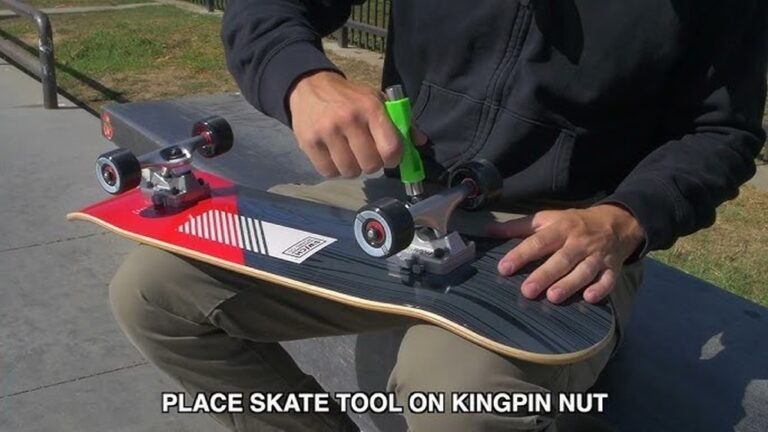
1. Remove The Wheels
Use your skate tool or wrench to take off the axle nuts. Pull the wheels off the trucks. Set the nuts and washers aside so you don’t lose them.
2. Take Out The Bearings
Carefully pry the bearings from each wheel. The easiest way is to use the axle itself: push the wheel halfway onto the axle, then gently lever the bearing out. Repeat for all bearings (usually 8 in total). Some wheels have bearing spacers inside—don’t lose them.
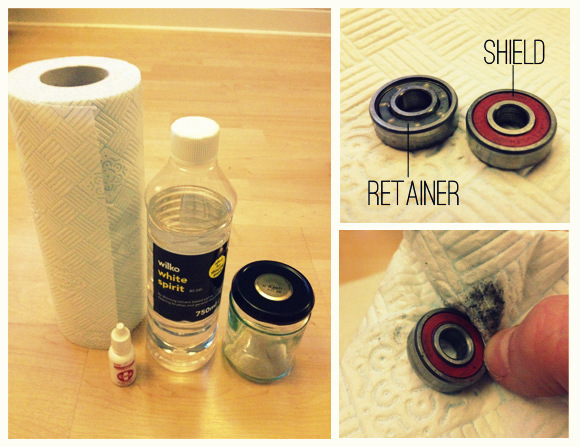
3. Remove Bearing Shields
Most skateboard bearings have thin covers called shields. These keep out dirt but need to come off for deep cleaning. Use a small screwdriver or pin to gently pop off the shield. Be careful not to bend or tear it. Note if your bearings have metal shields (not removable) or rubber shields (removable).
4. Soak And Clean The Bearings
Place all the bearings in your bowl or cup. Pour in enough cleaning solution to fully cover them. Swirl gently. Let them soak for at least 10 minutes. For stubborn grime, use an old toothbrush to scrub inside the bearings while they’re soaking.
- Pro Tip: If you have a bearing cleaning kit, use it to shake the bearings in the cleaner—this can remove more dirt.
After soaking, remove the bearings and set them on a clean towel or paper towels. Spin each bearing by hand—if it still feels gritty, repeat the cleaning.
5. Dry Thoroughly
Moisture is the enemy of skateboard bearings. Pat them dry with a lint-free cloth, then let them air dry for at least 30 minutes. Some skaters use compressed air (gently) to speed up drying.
6. Lubricate The Bearings
Apply 1-2 drops of bearing lubricant into each bearing. Spin them to distribute the oil evenly. Don’t over-lubricate—too much oil can attract dirt.
- Beginner Mistake: Using too much oil or the wrong type (like vegetable oil or WD-40) can ruin bearings.
7. Replace Shields And Reassemble
Snap the shields back onto each bearing. Press the bearings back into the wheels—use your hands or gently press against a hard surface. Reinstall the wheels onto your trucks and tighten the nuts until the wheels spin freely but don’t wobble.
How Often Should You Clean Bearings?
There’s no one-size-fits-all answer. It depends on how often you skate, where you ride, and the weather. Here are some basic guidelines:
- Every 1–2 months if you skate regularly
- After riding in rain, mud, or sand
- If your wheels sound noisy or feel rough
In one study, bearings cleaned every month lasted up to 50% longer than those left dirty.
When To Replace, Not Clean
Sometimes, cleaning isn’t enough. If your bearings are rusty, have broken parts, or still feel rough after cleaning, it’s time to replace them. High-quality bearings can last years with care, but cheap or damaged bearings may need replacement sooner.
Signs You Need New Bearings
- Visible rust or corrosion
- Cracked or warped shields
- Bearings still feel gritty after cleaning
- Wheels don’t spin freely, even with lube
Pro Tips For Extending Bearing Life
Many skaters unknowingly shorten their bearing lifespan. Here are some advanced tips:
- Avoid Water: Riding in the rain or through puddles quickly damages bearings. Water washes out lubricant and causes rust.
- Store Your Board Indoors: Humidity and temperature changes can affect metal parts.
- Check Axle Nuts: Too tight, and bearings can’t spin; too loose, and wheels wobble. Find the “sweet spot.”
- Carry Spare Bearings: If you skate long distances or at parks, keep a few extras on hand.

Credit: lushlongboards.com
Common Beginner Mistakes
Cleaning skateboard bearings is simple, but these mistakes can cause problems:
- Using household oils: These attract dust and gum up the bearings.
- Skipping the drying step: Trapped moisture leads to rust.
- Forcing shields back on: This can bend or damage them, reducing protection.
- Not cleaning after wet sessions: Even one ride in the rain can cause damage if not cleaned soon after.
Comparing Bearing Lubricants
Choosing the right lubricant is just as important as cleaning. Here’s a quick comparison:
| Lubricant Type | Spin Speed | Protection | Longevity |
|---|---|---|---|
| Skate-Specific Oil | High | Good | Medium |
| Light Machine Oil (e.g., 3-in-1) | Medium | Medium | Medium |
| Grease | Low | Excellent | Long |
Skate-specific oils are best for speed and everyday use. Grease offers more protection but can slow your wheels. Avoid thick or sticky oils—they can make bearings sluggish.
Credit: nottsrollerderby.co.uk
Advanced: Bearing Cleaning Kits Vs. Diy
Many skaters wonder if they should buy a bearing cleaning kit or just use household items. Here’s what you need to know:
| Method | Cost | Cleaning Power | Convenience |
|---|---|---|---|
| DIY (Cup + Alcohol) | Low | Good | Medium |
| Bearing Cleaning Kit | Medium/High | Excellent | High |
A cleaning kit usually comes with a container and rack to hold bearings while shaking. It speeds up cleaning but is not essential. DIY works fine for most skaters, especially beginners.
Environmental And Safety Tips
When you use strong cleaners like acetone or isopropyl alcohol, always work in a well-ventilated area. Wear gloves if your skin is sensitive. Dispose of used cleaning solution responsibly—don’t pour it down the drain.
If you care about the environment, look for biodegradable bearing cleaners. They’re safer for you and the planet. For more on safe chemical handling, see this CDC chemical safety guide.
Frequently Asked Questions
What Happens If I Never Clean My Bearings?
Over time, dirt and moisture build up inside the bearings, causing them to slow down, make noise, or even lock up. Uncleaned bearings can also rust or break, forcing you to buy new ones sooner.
Can I Use Wd-40 To Clean Skateboard Bearings?
WD-40 can remove dirt, but it’s not a true lubricant for bearings. It leaves a film that attracts more dust and can dry out the metal. Always use a proper bearing lubricant after cleaning.
How Do I Know If My Bearings Are Dry After Cleaning?
They should feel dry to the touch, with no moisture or residue. Spinning them by hand should sound smooth, not gritty. If you’re unsure, give them extra air-drying time before lubricating.
Is It Okay To Remove Both Shields From My Bearings?
Yes, but only if you’re doing a full clean and plan to replace both shields afterward. Riding without shields leaves bearings open to dirt and debris, shortening their life.
How Long Do Skateboard Bearings Usually Last?
With regular cleaning and care, good-quality bearings can last 1–2 years or more. Cheap bearings or those exposed to water and dirt may need replacing much sooner.
Cleaning skateboard bearings isn’t just for pros—it’s a simple, smart way to keep your board rolling fast and smooth. Once you try it, you’ll notice the difference in every ride. Take the time to do it right, and your bearings will reward you with better performance and longer life.
Happy skating!