
The allure of skateboarding lies in its freedom, its creativity, and the sheer exhilaration of carving up concrete. Whether you’re a seasoned pro landing complex tricks or a beginner just finding your balance, your skateboard deck is your most crucial piece of equipment. However, even the most robust decks are susceptible to wear and tear, and one of the most common and frustrating issues is delamination. This occurs when the layers of wood veneer that form the deck begin to separate, compromising its structural integrity and rideability.
Delamination isn’t just an aesthetic problem; it can lead to unpredictable board behavior, reduced pop, and even catastrophic failure during a trick or ride. Understanding what causes it, how to identify it, and crucially, how to fix it, can save your deck from an early demise and keep you rolling. While a completely delaminated deck might be beyond repair, minor separations can often be salvaged with the right approach and a bit of patience. This guide will walk you through the entire process, from diagnosing the problem to executing effective repairs.
Key Takeaways
-
- Delamination Definition: Separation of wood veneer layers in a skateboard deck, often caused by moisture, impact, or poor manufacturing.
- Early Detection is Crucial: Minor delamination can often be repaired, while severe separation may require deck replacement.
- Moisture is a Primary Culprit: Keeping your deck dry is paramount for preventing delamination.
- Repair Process: Typically involves injecting adhesive into separated layers and applying pressure to bond them.
- Essential Tools: Specialized wood glues and clamps are vital for a successful repair.
- Prevention is Key: Regular inspection and proper care can significantly extend your skateboard deck’s life.
Credit: www.instructables.com
Understanding Skateboard Delamination
Skateboard decks are typically constructed from seven to nine plies of maple veneer, cross-grained and pressed together with strong adhesive. This layered construction provides the deck with its strength, flexibility, and pop. Delamination occurs when this bond between the plies breaks down, allowing them to separate. This can manifest as a bubble, a crack, or a visible gap between the layers of wood.
Causes Of Delamination
Several factors can contribute to delamination, ranging from environmental conditions to physical stress. Understanding these causes is the first step in both prevention and repair.
Moisture Exposure
This is arguably the most common and insidious cause of delamination. Wood, by its nature, expands and contracts with changes in moisture content. When a skateboard deck gets wet, the wood plies absorb water, causing them to swell. As the deck dries, the wood contracts.
This repeated cycle of expansion and contraction weakens the adhesive bonds between the plies. Skateboarding in wet conditions, leaving your board in a damp environment, or even storing it in a humid garage can all lead to moisture-induced delamination. The water can seep into the microscopic cracks and seams, gradually breaking down the glue.
Impact And Stress
While skateboard decks are designed to withstand considerable force, extreme impacts can still cause delamination. Landing a trick poorly, slamming the board on the ground, or hitting a significant obstacle can create localized stress points that fracture the wood or the adhesive.
Repeated stress from ollieing, flipping, and grinding, especially if the deck has pre-existing weaknesses, can also contribute to ply separation over time. A particularly hard impact can create a visible crack, but sometimes the damage is internal, leading to a slow separation of the veneers.
Manufacturing Defects
Although less common with reputable manufacturers, defects in the manufacturing process can lead to premature delamination. Issues such as insufficient glue application, improper pressing during the lamination stage, or low-quality adhesives can result in weak bonds from the outset. This means the deck is more susceptible to delamination even under normal use. If delamination appears on a brand-new board, contact the manufacturer or retailer first, since it may be a warranty issue rather than a repair job.
Age And Wear
Even with diligent care, a skateboard deck will eventually succumb to the rigors of skateboarding. Over time, the constant stress, minor impacts, and exposure to various elements will naturally weaken the adhesive bonds. Older decks, especially those that have seen heavy use, are more prone to delamination simply due to cumulative wear and tear.
Identifying Delamination
Spotting delamination early is crucial for a successful repair. The signs can range from subtle to obvious.
Visual Cues
The most straightforward way to identify delamination is through visual inspection. Look for:
-
- Bubbles or Bulges: These appear as raised areas on the surface of the deck, indicating that the plies have separated and the wood has lifted.
- Cracks: While some cracks are surface-level, a crack that seems to go deeper or is accompanied by a separation of wood layers is a strong indicator of delamination.
- Gaps: You might be able to see a visible gap between the layers of wood, especially along the edges of the deck.
Auditory Cues
Sometimes, you can hear delamination before you see it. When you tap the deck with your knuckle or a similar object, a delaminated area will often sound hollow or duller compared to the solid sound of an intact section. This is because the air trapped between the separated plies creates a less dense structure.
Tactile Cues And Performance Issues
As delamination progresses, you’ll likely notice changes in how the board feels and performs:
-
- Soft Spots: The deck may feel unusually flexible or “soft” in certain areas, especially when you apply pressure with your feet.
- Reduced Pop: The characteristic “pop” you get when ollieing will diminish significantly, as the separated plies can no longer transfer energy efficiently.
- Unpredictable Flex: The board might flex in ways it didn’t before, making it feel unstable and less responsive.
The DIY Repair Process: Fixing Delamination
Repairing delamination is a task that many skateboarders can undertake themselves with the right tools and a methodical approach. The core principle is to re-bond the separated wood plies.
Tools And Materials You’ll Need
Gathering the necessary supplies before you start is essential for a smooth repair process.
-
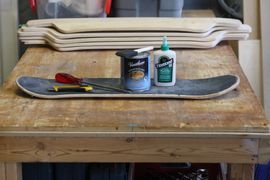
- Wood Glue: A high-quality, strong wood glue is paramount. Titebond III Ultimate Wood Glue is a popular choice due to its superior strength, water resistance, and long open time, which allows for thorough application. Other strong, waterproof wood glues can also be effective. For very small surface cracks, some repair guides also use thin cyanoacrylate or clear sealer only as a temporary edge seal, but these are not substitutes for a structural glue bond.
- Applicator: This could be a fine-tip nozzle, a syringe, or a thin, flexible spatula to inject the glue deep into the delaminated area.
- Clamps: You’ll need robust clamps to apply even pressure across the delaminated section while the glue dries. Bar clamps, C-clamps, or even heavy objects can work, but specialized woodworking clamps offer the best control.
- Protective Material: Wax paper, plastic wrap, or silicone baking mats are crucial to prevent glue from sticking to your clamps or the deck’s surface where it’s not needed.
- Sandpaper: Medium-grit sandpaper (around 100-150 grit) to clean any excess dried glue and a finer grit (220-320 grit) for finishing.
- Cleaning Supplies: Rags, isopropyl alcohol, or a mild soap and water solution for cleaning the area before and after.
- Safety Gear: Gloves and eye protection are recommended.
Step-by-Step Repair Guide
Follow these steps carefully to achieve the best results.
Step 1: Clean The Delaminated Area
Thoroughly clean the affected area. If there’s any dirt, grime, or old wax, remove it. Use a damp rag and mild soap, then dry it completely. If the delamination is accompanied by a visible crack, you might need to gently pry it open a bit to ensure the glue can penetrate effectively.
Step 2: Inject The Adhesive
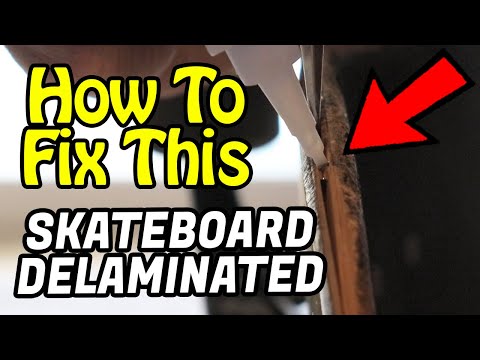
This is a critical step. Using your applicator, carefully inject the wood glue into the delaminated gap. Work the applicator in and out, ensuring that the glue spreads as far as possible into the separated layers. You want to fill the void completely without excessive overflow. Some skateboarders use a hypodermic syringe for precise application. If the delamination is a bubble, you may need to carefully create a small entry point with a thin blade or drill a tiny hole that can be disguised later. If the gap is tight, a flat-blade screwdriver or utility knife can help open it slightly, but do this carefully to avoid making the separation worse.
Step 3: Distribute The Glue
Once the glue is injected, gently flex the deck to help spread the adhesive evenly throughout the delaminated area. Be careful not to over-flex, especially if the delamination is extensive. You should feel and see the glue working its way through the separation.
Step 4: Apply Pressure With Clamps
This is where the clamps come in. Place a piece of protective material (like wax paper) between the deck and the clamp jaws to prevent sticking. Position the clamps so they apply firm, even pressure directly over the delaminated section.
If the delamination is a long crack, you might need multiple clamps spaced along its length. If it’s a bubble, try to distribute pressure evenly across the entire affected area. Ensure the deck is as flat as possible under the clamps.
Step 5: Clean Up Excess Glue
As you tighten the clamps, excess glue will likely squeeze out. Immediately wipe this excess away with a damp rag. It’s much easier to clean wet glue than dried glue. Be careful not to wipe away glue from the intended repair area.
Step 6: Allow Ample Drying Time
This is where patience is key. Refer to the glue manufacturer’s instructions for drying times, but generally, allow at least 24 hours for the glue to cure fully under pressure. For maximum strength, some recommend waiting even longer, up to 48-72 hours, especially if the board will be subjected to significant stress.
Avoid the urge to test the board prematurely.
Step 7: Remove Clamps And Inspect
Once the drying time has passed, carefully remove the clamps. Inspect the repaired area. The delamination should be gone, and the plies should be firmly bonded. You might see some dried glue residue, which can be carefully scraped off or sanded down.
Step 8: Sand And Finish (Optional)
If there are any rough edges or dried glue remnants, you can gently sand the area smooth. Start with medium-grit sandpaper and finish with a finer grit for a smooth surface. You can then apply a clear coat or grip tape to the area if desired.
Credit: www.youtube.com
When Repair Isn’t Possible: Deck Replacement
While DIY repairs can be effective for minor delamination, some situations necessitate replacing the entire deck. Recognizing these limits is crucial for safety and performance.
Signs Your Deck Is Beyond Repair
-
- Extensive Delamination: If the delamination covers a large portion of the deck, or if multiple areas are affected, the structural integrity is likely compromised beyond repair.
- Deep Cracks or Snapped Plies: If you see deep cracks that go through multiple plies, or if any of the wood plies are actually snapped or broken, the deck is structurally unsound.
- Severe Warping: If the deck has become significantly warped or twisted due to moisture or stress, repairs are unlikely to restore its intended shape or performance.
- Significant Softness/Flex: A deck that feels excessively soft or spongy, even after attempting repairs, is probably too compromised to be ridden safely.
- Previous Major Damage: A deck that has already sustained significant damage, such as a broken tail or nose, is less likely to benefit from delamination repair.
Choosing A New Deck
When it’s time for a new deck, several factors come into play. Understanding these can help you make an informed choice.
Deck Size And Shape
-
- Width: Generally, narrower decks (7.5-8.0 inches) are preferred for flip tricks due to their lighter weight and easier maneuverability. Wider decks (8.0+ inches) offer more stability and are often favored for transition skating, cruising, or for riders with larger shoe sizes. Match wheelbase and width to your stance and terrain, not just the graphic or trend.
- Length: Deck length is less critical for most street skating but can influence stability.
- Concave: The curvature of the deck from edge to edge. Deeper concaves offer more foot lock-in for tricks, while flatter concaves can be more comfortable for cruising.
- Nose and Tail: The shape and angle of the nose and tail affect pop and trick execution.
Wood Type And Construction
Most professional skateboard decks are made from North American Maple. Look for decks constructed with high-quality veneers and strong, water-resistant glue. Some manufacturers offer different constructions, such as carbon fiber reinforcements, which can increase durability and pop but also cost. For insights into reputable brands, consider guides on Element Skateboards or Santa Cruz Skateboards. If you ride hard or live in a damp climate, look for decks with reinforced construction, but remember that no deck is waterproof.
Graphics And Aesthetics
While not impacting performance, the graphics are a significant part of skateboard culture. Choose a deck with artwork that resonates with you.

Credit: www.thinairpress.com
Prevention: Keeping Your Deck In Top Shape
The best way to deal with delamination is to prevent it from happening in the first place. Diligent care and smart riding habits can significantly extend the life of your skateboard.
Protecting Your Deck From Moisture
-
- Avoid Wet Conditions: Whenever possible, avoid skating in the rain, through puddles, or on wet surfaces.
- Dry Your Board: If your board does get wet, wipe it down immediately with a dry cloth. Let it air dry completely in a well-ventilated area, away from direct heat sources that could warp the wood.
- Proper Storage: Store your skateboard in a dry, climate-controlled environment. Avoid leaving it in a car trunk, a damp basement, or a humid garage. A skateboard bag or rack can help protect it.
Smart Riding And Maintenance Habits
-
- Inspect Regularly: Make it a habit to inspect your deck for any signs of damage, especially after hard sessions or unexpected impacts. Check for cracks, pressure marks, and early signs of delamination.
- Learn Proper Landing Techniques: As you progress in skateboarding, focus on landing tricks smoothly and absorbing impact correctly. This reduces unnecessary stress on your deck. Resources on easy skateboard tricks for beginners and intermediate skateboard tricks often include landing tips.
- Avoid Excessive Grinding on Rough Surfaces: While grinding is a core part of skateboarding, constantly grinding on very abrasive surfaces can wear down the edges of your deck, potentially exposing the plies to moisture and damage.
- Be Mindful of Weight Limits: While most decks are strong, exceeding the intended weight capacity or performing excessively forceful maneuvers can put undue stress on the board.
Understanding Pressure Cracks
It’s important to distinguish between delamination and pressure cracks. Pressure cracks are hairline fractures that often appear on the surface of the deck, usually near the edges or under the truck mounts, caused by the pressure of the trucks or landing impacts. While they can weaken the deck over time, they are not the same as delamination, which is a separation of the plies. However, deep pressure cracks can sometimes lead to delamination if moisture gets into them. You can find more information on preventing and fixing pressure cracks here.
Case Study: The Weekend Warrior’s Deck
Meet Alex, an enthusiastic skateboarder who rides primarily on weekends. Alex noticed a slight bulge on the side of his favorite deck after an intense session that involved some unexpected encounters with puddles on his way home. Initially, he ignored it, but soon he felt a noticeable “softness” when doing ollies.
Diagnosis: Alex examined the deck closely and found a distinct bubble near the edge, about the size of a quarter. Tapping it produced a hollow sound. He realized it was delamination, likely exacerbated by the recent moisture exposure.
Repair: Alex decided to attempt a DIY repair. He purchased Titebond III wood glue and a syringe applicator. He carefully injected the glue into the delaminated area, flexing the board gently to spread it. He then used a C-clamp, with wax paper protecting the deck, to press the bubble flat. After letting it cure for 48 hours, he removed the clamp.
Outcome: The repair was successful. The bubble was gone, the deck felt solid again, and the pop was restored. Alex learned the importance of drying his board and avoiding wet conditions, significantly extending the life of his deck and saving money on a replacement. This experience highlighted how proactive care and simple repairs can keep a board rideable for much longer.
Comparison: Delamination Repair Vs. Deck Replacement
Choosing between repairing a delaminated deck and replacing it involves weighing several factors, including cost, time, and the extent of the damage.
| Factor | Delamination Repair | Deck Replacement |
|---|---|---|
| Cost | Low (cost of glue, clamps if needed) | Moderate to High (cost of a new deck, typically $40-$80+ depending on brand, construction, and retailer) |
| Time Investment | Moderate (cleaning, gluing, clamping, drying time) | Low (purchase and swap decks) |
| Skill Required | Basic DIY skills, patience | Basic mechanical skills (swapping trucks) |
| Structural Integrity | Can restore for minor to moderate delamination, but not every repair should be trusted for hard skating | Guaranteed new, strong structure |
| Performance Impact | Can restore lost pop and stiffness | New deck typically offers optimal performance |
| Risk of Failure | Slight risk if not done correctly or if damage is severe | Minimal risk if using a quality new deck |
| Suitability For | Minor bubbles, small cracks, localized separation | Extensive delamination, deep cracks, warped decks, general wear |
Frequently Asked Questions
What Is The Best Type Of Glue For Fixing Skateboard Delamination?
The best glues are strong, waterproof wood glues with a long open time. Titebond III Ultimate Wood Glue is highly recommended due to its superior strength, water resistance, and flexibility. Cyanoacrylate (super glue) is generally not suitable as it can be brittle and doesn’t fill gaps well. Epoxy can also be used in some repairs, but it is less forgiving for this kind of layered wood repair and can be messy.
How Long Does A Repaired Deck Typically Last?
The lifespan of a repaired deck depends heavily on the extent of the original delamination, the quality of the repair, and how the board is used afterward. A well-executed repair on minor delamination can extend the life of a deck by months or even years.
However, if the delamination was extensive or the underlying wood structure was significantly compromised, the repair might only be a temporary fix.
Can I Use Wood Filler To Fix Delamination?
No, wood filler is not suitable for repairing delamination. Wood filler is designed to fill small cosmetic gaps and holes, not to re-bond structural layers of wood. It lacks the strength and adhesive properties needed to restore the integrity of the skateboard deck.
Is It Safe To Skate On A Delaminated Board?
It is generally not safe to skate on a significantly delaminated board. Delamination compromises the structural integrity of the deck, making it unpredictable and prone to snapping or breaking unexpectedly, especially during tricks or hard landings. This can lead to serious injuries. Minor, superficial delamination that has been successfully repaired is usually safe, but always err on the side of caution and stop riding immediately if the board still feels soft, hollow, or unstable.
How Can I Prevent My Skateboard Deck From Delaminating In The First Place?
The most effective prevention method is to keep your deck dry. Avoid skating in wet conditions, and if your board gets wet, dry it thoroughly and allow it to air dry completely. Store your skateboard in a cool, dry place away from moisture and extreme temperatures. Regular inspection for early signs of damage and proper landing techniques also contribute to a longer deck life.
The bond between wood plies is the backbone of your skateboard’s performance and durability. While delamination can be a disheartening issue, it doesn’t always spell the end for your beloved deck. By understanding its causes, learning to identify the signs, and employing careful repair techniques, you can often salvage your board and get back to riding.
Remember that prevention is always better than a cure; diligent care, especially regarding moisture, will go a long way in keeping your deck strong and responsive for countless sessions. When the damage is too severe, however, recognizing when to replace your deck ensures your safety and enjoyment on the streets or at the park.